
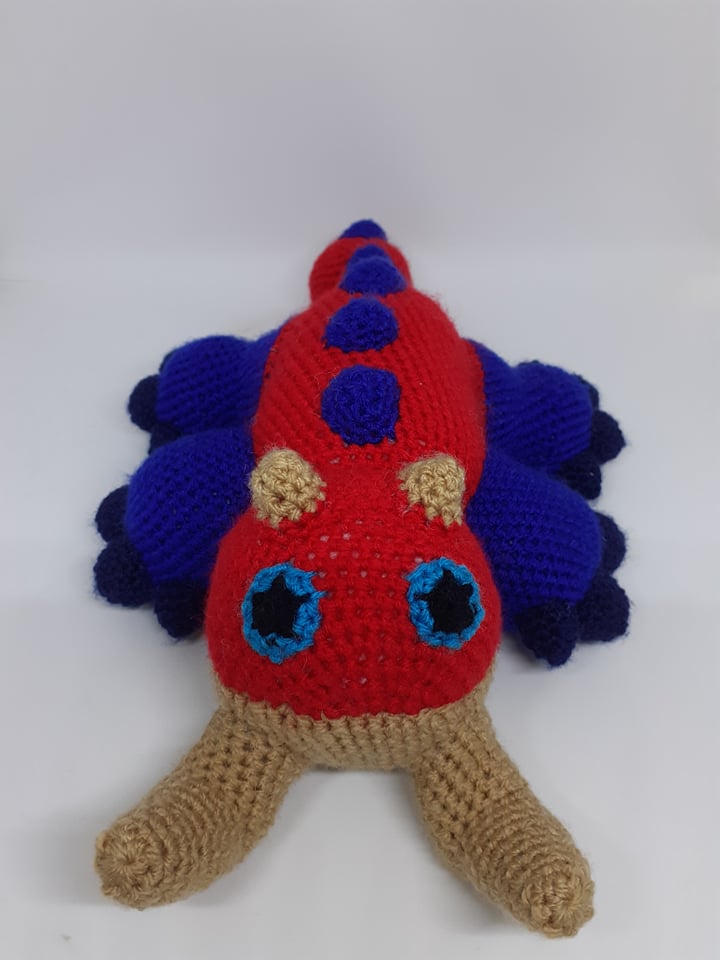
TETSUCABRA FROM MONSTER HUNTER CROCHET PATTERN
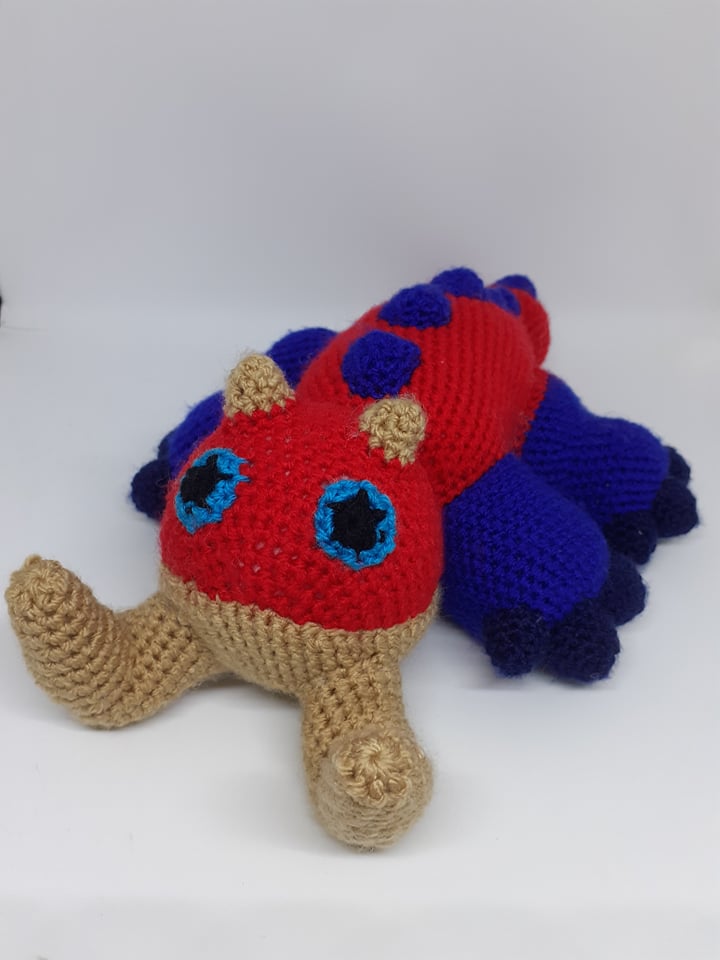
Tetsucabra, I first saw this guy on Monster Hunter Stories 2 - Wings Of Ruin and I fell on love with his colours, shapes and attitude! As my second ever Monster Hunter game, I still have a lot of Monsters to meet and make, keep an eye on this site for pattern adds and updates.
This Tetsucabra works up quite fast considering the size he comes out at, and he's very squishy and cuddly too - take it from me!
If you use a 4mm hook and yarn like I did, your Tetsu should come out at approximately 12 inches (31cm) long from tip of the tusk to tip of the tail, and 7.5 inches (20cm) wide from toe to toe.
"Don't like being hunted? Dig up a boulder and use that as a shield."
- Tetsucabra 2021.
Printable PDF version of this pattern can be found, as always, in my Etsy Store
Materials
4mm crochet hook
4mm yarn in red, dark blue, navy blue, tan, (OPTIONAL - you can use felt instead) light blue and black for the eyes
Toy stuffing
Yarn / Embroidery needle
Abbreviations
SC – Single Crochet
INC – Increase
DEC – Decrease
** - Repeat around
Pattern
Head - Red
Magic Ring 8 (8)
1 Inc around (16)
2 *sc, inc* (24)
3 *2 sc, inc* (32)
4 *3 sc, inc* (40)
5 *4 sc, inc* (48)
6 – 15 Sc around (48)
16 *4 sc, dec* (40)
17 *3 sc, dec* (32)
18 *2 sc, dec* (24)
19 *sc, dec* (16)
- Finish off, stuff, leave a long tail for sewing
Body - Red
Magic Ring 8 (8)
1 Inc around (16)
2 *sc, inc* (24)
3 Sc around (24)
4 *2 sc, inc* (32)
5 Sc around (32)
6 *3 sc, inc* (40)
7 – 8 Sc around (40)
9 *4 sc, inc* (48)
10 – 28 Sc around (48)
29 *4 sc, dec* (40)
30 Sc around (40)
31 *3 sc, dec* (32)
32 Sc around (32)
33 *2 sc, dec* (24)
34 Sc around (24)
35 *sc, dec* (16)
- Finish off, stuff, leave a long tail for sewing
Front Legs (x2) – Dark Blue
Magic Ring 8 (8)
1 Inc around (16)
2 *sc, inc* (24)
3 *2 sc, inc* (32)
4 – 16 Sc around (32)
- Finish off, stuff and leave a long tail for sewing
Back Legs (x2) – Dark Blue
Magic Ring 8 (8)
1 Inc around (16)
2 *sc, inc* (24)
3 *2 sc, inc* (32)
4 – 7 Sc around (32)
8 *2 sc, dec* (24)
9 – 12 Sc around (24)
13 *2 sc, inc* (32)
14 Sc around (32)
15 *3 sc, inc* (40)
16 – 18 Sc around (40)
- Change to Red -
19 Sc around (40)
- Finish off, stuff and leave a long tail for sewing.
Tail - Red
Magic Ring 8 (8)
1 Inc around (16)
2 *sc, inc* (24)
3 Sc around (24)
4 *2 sc, inc* (32)
5 – 10 Sc around (32)
11 *2 sc, dec* (24)
12 *sc, dec* (16)
13 – 16 Sc around (16)
17 *sc, inc* (24)
18 – 20 Sc around (24)
21 *2 sc, inc* (32)
22 – 25 Sc around (32)
- Finish off, stuff and leave a long tail for sewing.
Chin – Tan
Magic Ring 8 (8)
1 Inc around (16)
2 *sc, inc* (24)
3 *2 sc, inc* (32)
4 *3 sc, inc* (40)
5 *4 sc, inc* (48)
6 *5 sc, inc* (56)
7 – 10 Sc around (56)
- Finish off, leave a very long tail for sewing
Tusks Part 1 (x2) – Tan
Magic Ring 8 (8)
1 Inc around (16)
2 – 10 Sc around (16)
- Finish off, leave a long tail for sewing
Tusks Part 2 (x2) – Tan
Magic Ring 8 (8)
1 Sc around (8)
2 *sc, inc* (12)
3 – 4 Sc around (12)
5 *2 sc, inc* (16)
6 – 8 Sc around (16)
- Finish off, turn inside out and stuff, leave a long tail for sewing
Claws (Large) (x8) – Navy Blue
Magic Ring 8 (8)
1 *sc, inc* (12)
2 *2 sc, inc* (16)
3 – 4 Sc around (16)
- Finish off, turn inside out and stuff lightly. Leave a long tail for sewing
Claws (Small) (x8) – Navy Blue
Magic Ring 6 (6)
1 *sc, inc* (9)
2 *2 sc, inc* (12)
3 Sc around (12)
- Finish off, turn inside out and stuff lightly. Leave a long tail for sewing
Horns (x2) – Tan
Magic Ring 6 (6)
1 *sc, inc* (9)
2 *2 sc, inc* (12)
- Change to Red -
3 Sc around (12)
- Finish off, turn inside out and stuff lightly. Leave a long red tail for sewing
Back Spots (x6) – Dark Blue
Magic Ring 8 (8)
1 *sc, inc* (12)
2 *2 sc, inc* (16)
- Finish off, turn inside out. Leave a long tail for sewing. I’d recommend rolling some stuffing into a small ball to insert into these at the assembly section.
OPTIONAL: You can make these out of felt. Just create a light blue base with a black pupil.
Eyes (x2) – Black
Magic Ring 6 (6)
- Change to Light Blue -
1 Inc around (12)
- Finish off, leave a long tail for sewing
Assembly
Start with the legs and claws. Take up the front legs and pin the claws on across the end of the leg with 2 of the larger claws in the middle and 2 of the smaller ones each side. When you’re happy with placements, sew them neatly in place.
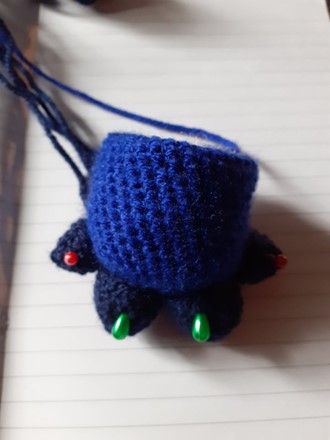
Next, do the same with the back legs.
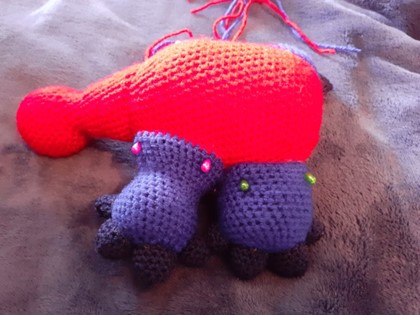
When you’re happy with the completed legs, take up the body, tail and all the legs and plenty of pins.
Pin the tail to the end of the body (the starting end) and pin the legs to the body making sure the Tetsucabra can lie flat. When you’re happy with all the placements, sew the pieces neatly on.
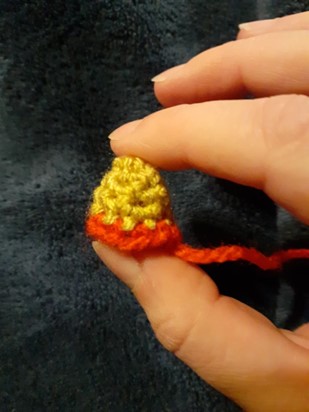
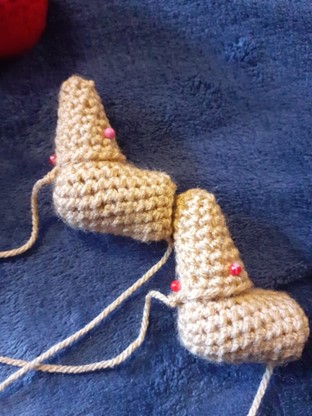
Next, take up both parts of the tusks and work them together.
Pin Part 2 on to the end of Part 1 and sew it neatly on. Please see picture.
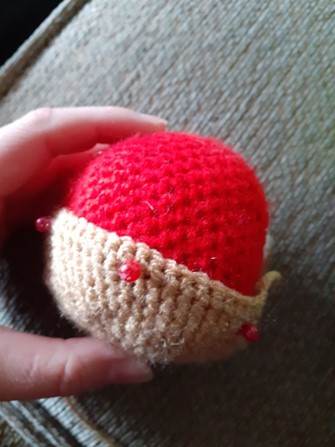
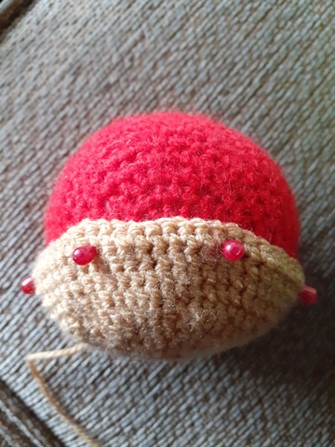
When the tusks are complete, take up the chin and the head. Pin the chin to the head and sew it neatly in place when you’re happy with the placement.
Take up the completed tusks and pin them to the chin.
Sew them neatly on when you're happy.
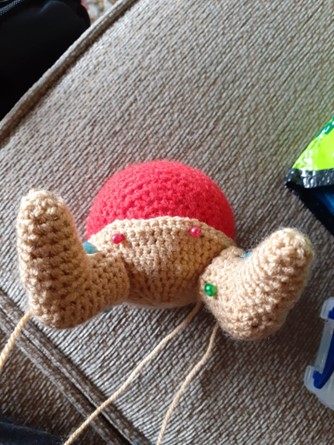

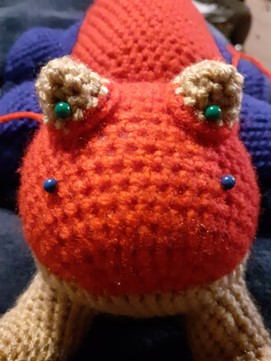
Take up the horns and pin them to the top of the head. Sew them in place when ready.
I suggest marking out where you want the eyes to go with pins too, I always find this helps.
Almost there!
Take up the eyes and pin them to the head, sew them on when you’re happy with their placements.

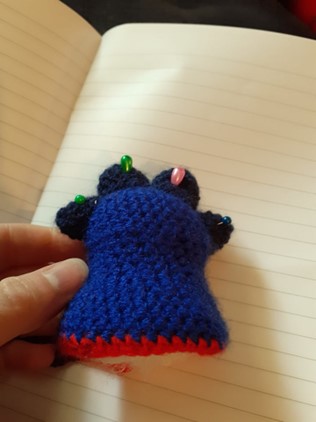
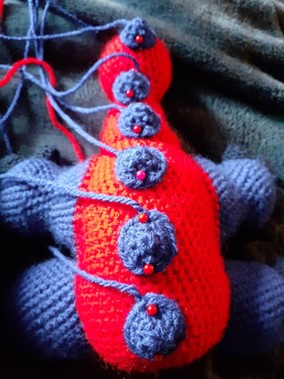
Set the completed head aside for now and take up the back spots. Pin them down the back spread out neatly from the back of the neck to the tail.
When sewing these on, you may wish to poke a little bit of stuffing under these spots to help them hold a bumped shape.

Finally, pin the head to the body and sew it on, I found using a ladder stitch was the best option for this.
Then that’s it!
You’re done!
Enjoy your new adorable lazy Tetsucabra!
Just make sure he doesn’t dig up your street looking for boulders.
STEP BY STEP TUTORIAL
Coming soon!
If you have any questions about this pattern, feel free to contact me.
This pattern is property of BlueFoxPaws. Please do not claim or resell this pattern as your own. You can sell the finished product as long as credit is given -BlueFoxPaws-.
Leave a Reply