
STINGRAY CROCHET PATTERN
This adorable stingray works up nice and quickly and only uses some basic stitches. In US terms, you'll need basic knowledge of SC, INC, DEC and HDC (half double crochet), all of which I have tutorials available of how to do each stitch over on my YouTube channel BlueFoxPaws if you need to have a quick refresher :)
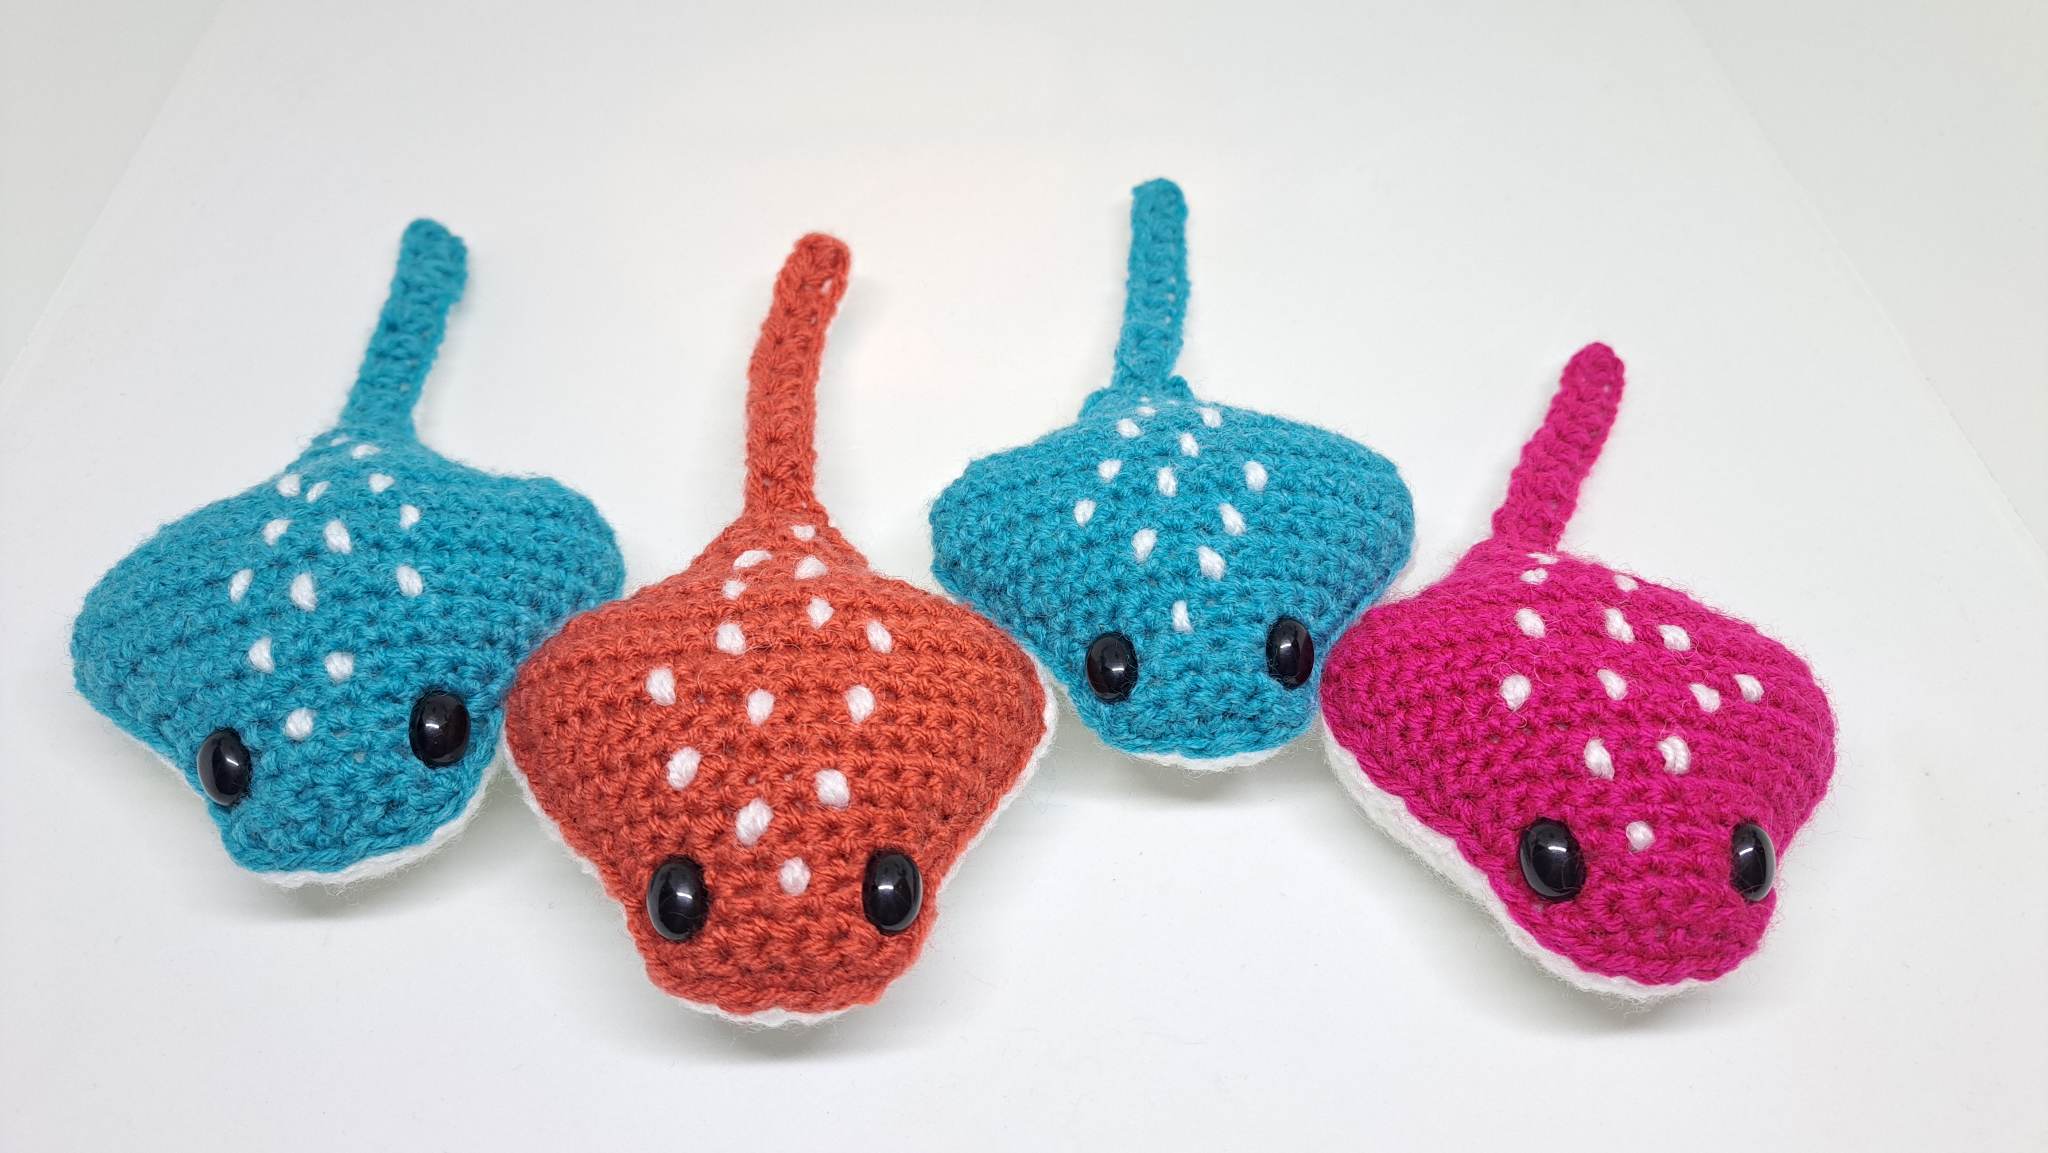
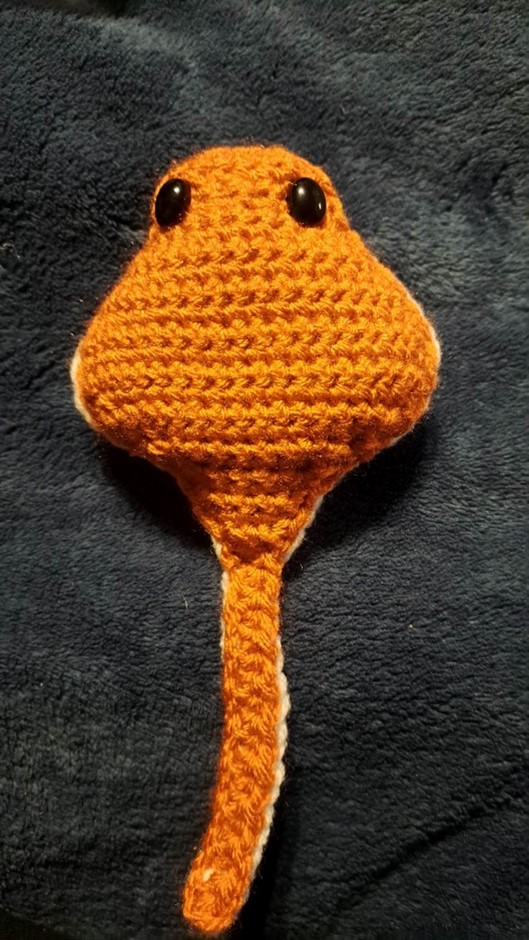
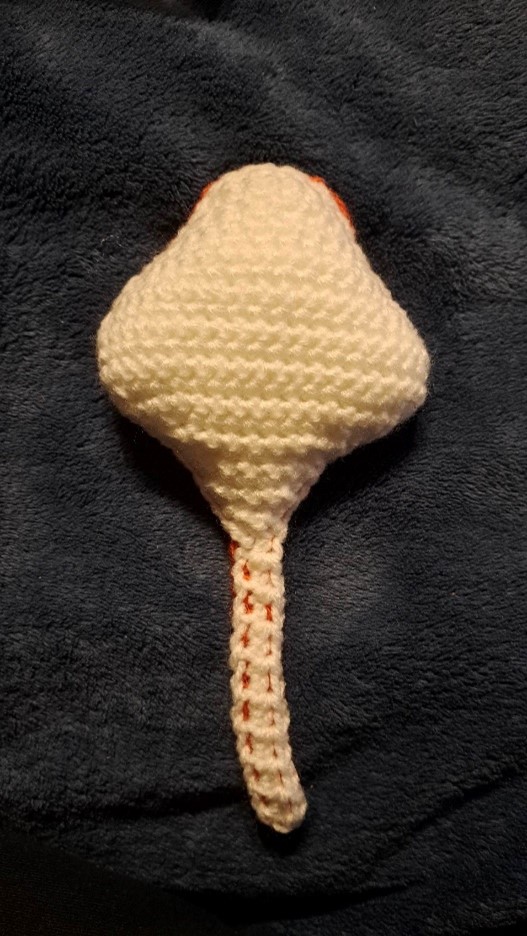
The finished ray should come in at a lovely 7" long from nose to tail and 3.5" wide from fin to fin. If you use a 4mm hook like I did this measurement should be accurate.
I have to admit I've been slightly obsessing over these guys and have now made a small army just because I can... I have no idea what to do with them!
Printable PDF version available in my Etsy Store
Materials:
4mm crochet hook
4mm yarn in colour A and B, you can choose any colour you'd like - for this pattern my colour A will be Orange and B will be White. A is top colour, B is belly colour.
Optional 9x11mm safety eyes, you can use 9mm eyes or use felt and glue, embroider them, needle felt or even crochet them.
Tapestry / embroidery needle
Abbreviations:
SC – Single Crochet
INC – Increase
DEC – Decrease
HDC - Half Double Crochet
CH - Chain
Pattern
Main Body – make 2 of these, one in yarn colour A, one in yarn colour B.
Don’t forget to CHAIN 1, TURN at the end of each row.
Start with chain 7. Sc into the 2nd loop from the hook and sc back to the starting ch. (6)
1 – 2 Sc across (6)
3 inc, 4 sc, inc (8)
4 inc, 6 sc, inc (10)
5 inc, 8 sc, inc (12)
6 inc, 10 sc, inc (14)
7 inc, 12 sc, inc (16)
8 inc, 14 sc, inc (18)
9 inc, 16 sc, inc (20)
10 inc, 18 sc, inc (22)
11 – 12 Sc across (22)
13 dec, dec, 14 sc, dec, dec (18)
14 dec, 14 sc, dec (16)
15 dec, dec, 8 sc, dec, dec (12)
16 dec, dec, 4 sc, dec, dec (8)
17 dec, 4 sc, dec (6)
18 – 19 Sc across (6)
20 dec, 2 sc, dec (4)
21 Sc across (4)
22 dec, dec (2)
Chain 1, turn
Ch 19, hdc into the 2nd loop from the hook and hdc 17 more times back to the base of the tail. (18)
Slip Stitch to join the tail to the base.
Chain 1, then proceed to sc around the entire outside of the piece working anticlockwise. Finish at the base of the tail (do not sc around the tail). Please see photos below for reference.
Finish off colour A with a long tail as this will be used to sew the pieces together.
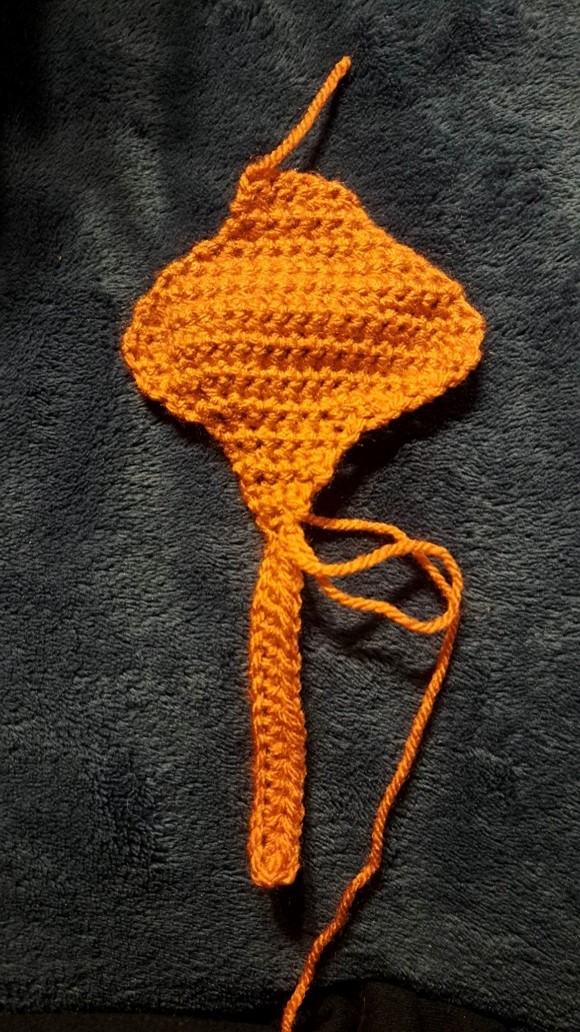
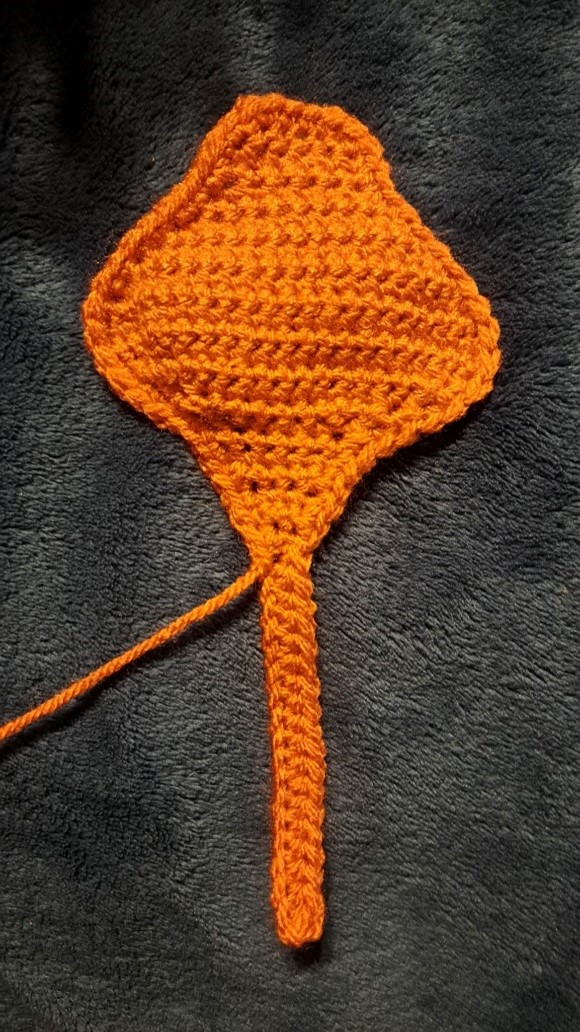
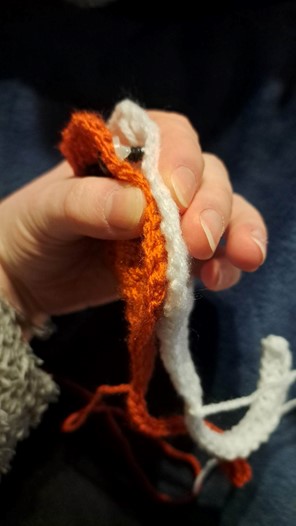
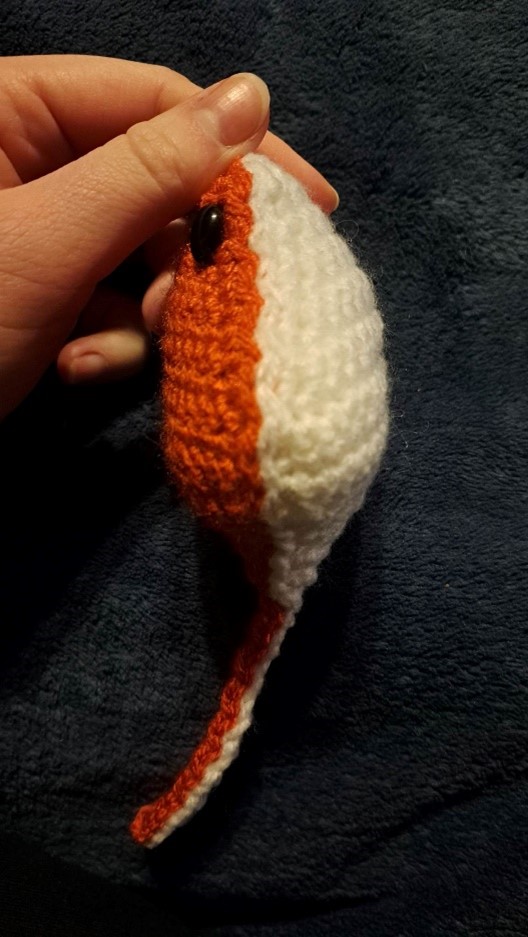
The edges will start to curl inwards, this is perfectly normal and will actually help when sewing together. The “front”” of each piece will be the side where the edges curl inwards, the right hand picture is my "front".
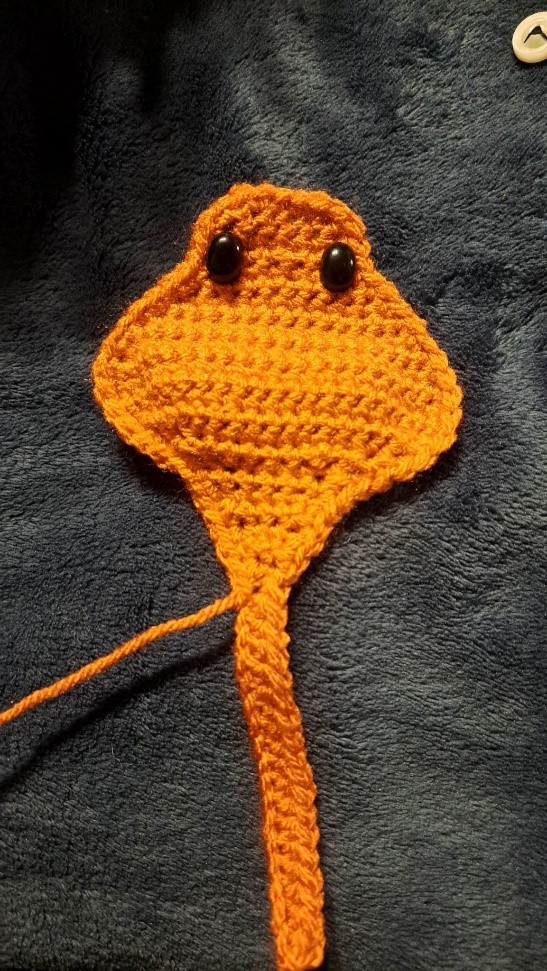
Next,
if you’re using safety eyes, set them in now. I set mine in on Row 3 but this
is optional, set them as high or low as you’d like and set them as far apart as
you see fit.
Don’t
worry if the backs are sticking out, they’ll be cushioned by the stuffing!
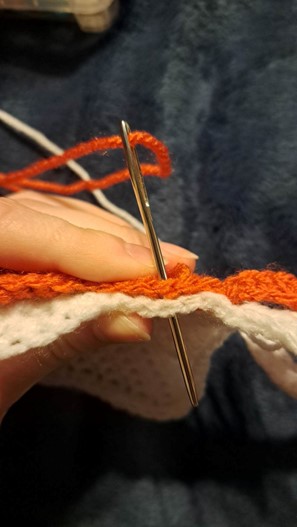
Time to sew the pieces together. Take up both body pieces and make sure the “front” is facing outwards on both sides, it’s a lot easier to sew the pieces together like this. Be sure that they line up! Sew the pieces together using the yarn A tail and using a Running Stitch. Be sure to work through each SC neatly and keep your stitches tight.
When you sew around the body and get to the other side of the tail base (before you sew the tail pieces together), take up some stuffing and stuff the Ray a small piece at a time. Make sure that you stuff the nose area well, get the stuffing around the backs of the safety eyes to really cushion them.
Don’t overstuff the body, if you can see stuffing through the stitches, it’s overstuffed!
Almost done, time for the details!
Take up a long strand of white yarn (or any colour of your choosing) and embroider some spots on the back following any pattern you’d like. Personally I really like how the spots going up the back look, but do whichever design you’d like, for example spots on the fins or just around the head / nose.

When you’re happy with your details, then that’s it!
You’re done!
Enjoy your new adorable Sting Ray!
STEP BY STEP TUTORIAL
If you have any questions about this pattern, feel free to contact me.
This pattern is property of BlueFoxPaws. Please do not claim or resell this pattern as your own. You can sell the finished product as long as credit is given -BlueFoxPaws-.
Leave a Reply