
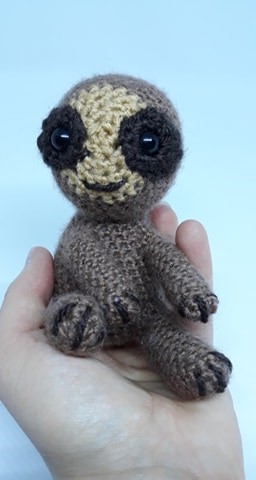
SLOTH CROCHET PATTERN
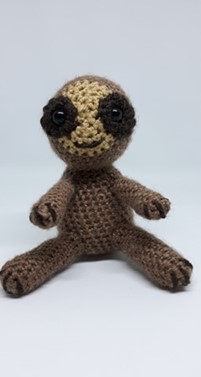
Ah the sloth, such a relatable animal - especially at the weekends! This little dude works up pretty fast and comes out at an adorable size. The eye section can be a bit fiddly but read it once, twice, three times to make sure you understand it before setting the safety eyes in!
Although the safety eyes can be optional - you could use felt, needle felting or even embroidery to make the eyes, in this pattern I'll be using safety eyes.
Materials:
4mm crochet hook
4mm yarn in light brown, dark brown and pale brown
9mm Safety Eyes
Toy stuffing
Abbreviations
SC – Single Crochet
INC – Increase
DEC – Decrease
DBL – Double Crochet
TRB – Treble Crochet
SL – Slip Stitch
** - Repeat around
Pattern
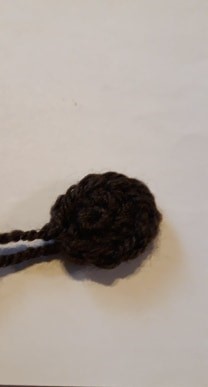
Eyes (x2) – Dark Brown
Please read this part carefully.
Magic Ring 6 (6)
Don’t pull the circle tight, leave a hole in the centre. SL the ring ‘closed’.
Working your way around the Magic Ring, please crochet:
Inc, inc, dbl, dbl, trb, trb, dbl, dbl, inc (sl to the first inc to finish circle.)
You should have a total of 12 stitches, not counting the final sl.
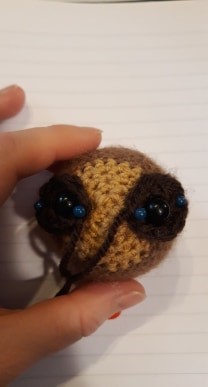
Taking the 9mm safety eyes, insert them into the centre hole of the Magic Ring. Set them aside for now and do NOT set the backs on yet.
Head – Start with Pale Brown
Magic Ring 6 (6)
1 Inc around (12)
2 *sc, inc* (18)
3 *2 sc, inc* (24)
- Change to Light Brown -
4 *3 sc, inc* (30)
5 *4 sc, inc* (36)
6 – 11 Sc around (36)
12 *4 sc, dec* (30)
13 *3 sc, dec* (24)
14 *2 sc, dec* (18)
- Stuff, add and set the eyes to the head now before finishing the head off. The Pale Brown section is the face.
15 *sc, dec* (12)
16 Dec around (6)
- Finish off, finish stuffing and tie the end of the head closed.
Body – Light Brown
Magic Ring 6 (6)
1 Inc around (12)
2 *sc, inc* (18)
3 *2 sc, inc* (24)
4 *3 sc, inc* (30)
5 – 15 Sc around (30)
16 *3 sc, dec* (24)
17 Sc around (24)
18 *2 sc, dec* (18)
19 – 20 Sc around (18)
- Finish off, stuff, leave a long tail for sewing
Legs (x2) – Light Brown
Magic Ring 6 (6)
1 Inc around (12)
2 – 13 Sc around (12)
- Finish off, stuff lightly and leave a long tail for sewing
Arms (x2) – Light Brown
Magic Ring 6 (6)
1 *sc, inc* (9)
2 – 10 Sc around (9)
- Finish off, stuff lightly and leave a long tail for sewing
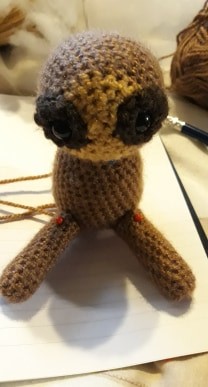
Assembly
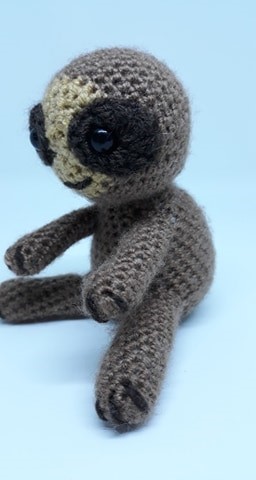
Start with the head and body. Pin the head to the top of the body neatly and use the body’s finishing off tail to sew the head in place.
Next, pin the legs to the bottom of the sloth and make sure it can sit by itself, then sew them neatly on.
Pin the arms just below the neck and again, sew neatly on.
Finally, take some Dark Brown yarn and carefully embroider some claws (I did 3) on to the ends of the arms and legs, and then a small piece for the mouth.
That’s it! You’re done!
Enjoy your new sloth!
STEP BY STEP TUTORIAL
Coming soon!
If you have any questions about this pattern, feel free to contact me.
This pattern is property of BlueFoxPaws. Please do not claim or resell this pattern as your own. You can sell the finished product as long as credit is given -BlueFoxPaws-.
Leave a Reply