
LITWICK PATTERN
I made a *Shiny* Litwick!
I made this a while back for one of my best friends over the pond as a gift, they gladly recieved it and even used this pattern to make their own version when they were learning to crochet!
This page is for you Centi :)
Ah Litwick, what an interesting little soul, this lovely Pokemon is from Generation 5 of the very popular Pokemon game and has been a firm fan favourite! I must admit I absolutely LOVED working on this little guy.
This bright spark comes in at 5.5 inches tall and an adorable 3.5 inches wide from foot to foot, so the perfect size to display or play with!
Materials:
4mm crochet hook4mm yarn in white, blue, light blue and neon yellow
*For non-shiny version, swap the blues to purples.
Toy stuffing
Tapestry / Embroidery needle
Black yarn / felt for the mouth.
Abbreviations
SC – Single Crochet
INC – Increase
DEC – Decrease
HDC – Half Double Crochet
DBL – Double Crochet
TRB – Treble Crochet
** - Repeat around
Pattern
Body - White
Magic Ring 8 (8)
1 Inc around (16)
2 *sc, inc* (24)
3 *2 sc, inc* (32)
4 *3 sc, inc* (40)
5 *4 sc, inc* (48)
6 – 18 Sc around (48)
19 *4 sc, dec* (40)
20 – 24 Sc around (40)
25 *3 sc, dec* (32)
26 *2 sc, dec* (24)
27 *sc, dec* (16)
28 Dec around (8)
- Finish off, stuff, leave a long tail for sewing
Legs (x4) - White
Magic Ring 8 (8)
1 Inc around (16)
2 *3 sc, inc* (20)
3 – 7 Sc around (20)
- Finish off, don’t stuff and leave a long tail for sewing
Arms (x2) - White
Magic Ring 8 (8)
1 Inc around (16)
2 – 3 Sc around (16)
4 Dec around (8)
5 – 7 Sc around (8)
- Finish off, stuff very lightly and leave a long tail for sewing
Large Wax Drop - White
Magic Ring 8 (8)
1 Inc around (16)
2 *sc, inc* (24)
3 *2 sc, inc* (32)
4 – 12 Sc around (32)
- Finish off, don’t stuff and leave a long tail for sewing
Small Wax Drop (Face) - White
Magic Ring 8 (8)
1 Inc around (16)
2 *sc, inc* (24)
3 – 6 Sc around (24)
- Finish off, don’t stuff and leave a long tail for sewing
Small Wax Drops (Back) (x2) - White
Magic Ring 8 (8)
1 Inc around (16)
2 *sc, inc* (24)
3 – 8 Sc around (24)
- Finish off, don’t stuff and leave a long tail for sewing
Head Cap - Blue (purple for non-shiny)
Magic Ring 8 (8)
1 Inc around (16)
2 *sc, inc* (24)
3 *2 sc, inc* (32)
4 *3 sc, inc* (40)
5 *4 sc, inc* (48)
- Finish off, leave a long tail for sewing
Flame - Blue (purple for non-shiny)
Magic Ring 8 (8)
1 *sc, inc* (12)
2 – 3 Sc around (12)
4 *2 sc, inc* (16)
5 Sc around (16)
6 *3 sc, inc* (20)
7 – 9 Sc around (20)
10 *3 sc, dec* (16)
11 Sc around (16)
12 *2 sc, dec* (12)
13 Sc around (12)
- Finish off, stuff lightly and leave a long tail for sewing
You can use felt and
glue or embroidery for this section.
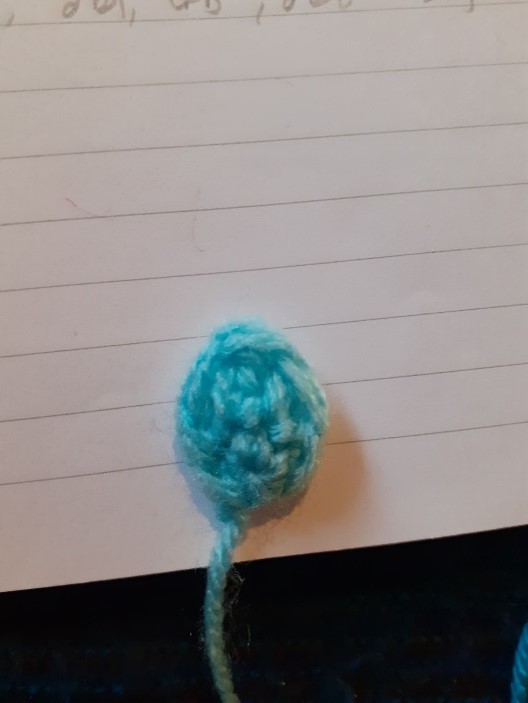
Flame Detail - Light Blue (purple for non-shiny)
Magic Ring 6 (6)
1 hdc,
dbl, trb, trb, dbl, hdc, slip stitch to finish.
- Finish off, leave a
long tail for sewing
OPTIONAL.
You can use felt, embroidery or needle felting for this section if you wish.
Eye (x1) - Neon Yellow
Magic Ring 6 (6)
1 Inc around (12)
- Finish off, leave a long tail for sewing
Assembly
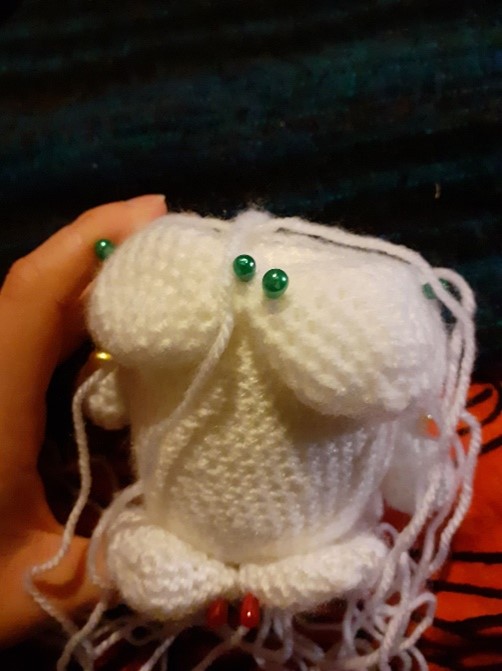
You may wish to start by pinning the whole Litwick together, this is what I did to help with placements.
Start with all the white pieces!
Pin the legs / feet to the bottom of the body (the finishing off end) and pinch them flat. When you’re happy with the placement and Litwick can stand on it’s own, sew them in place.
I found using a whip stitch was best.
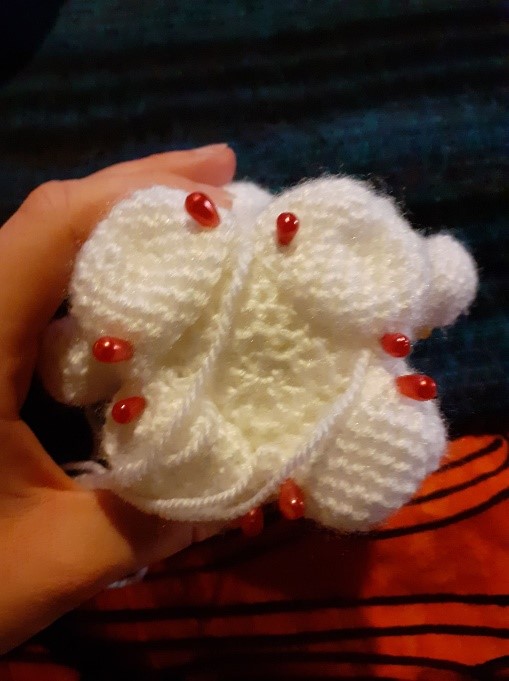
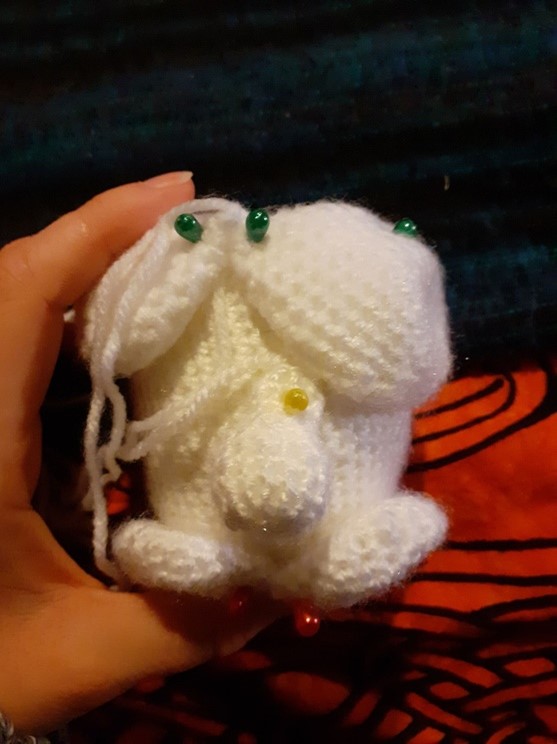
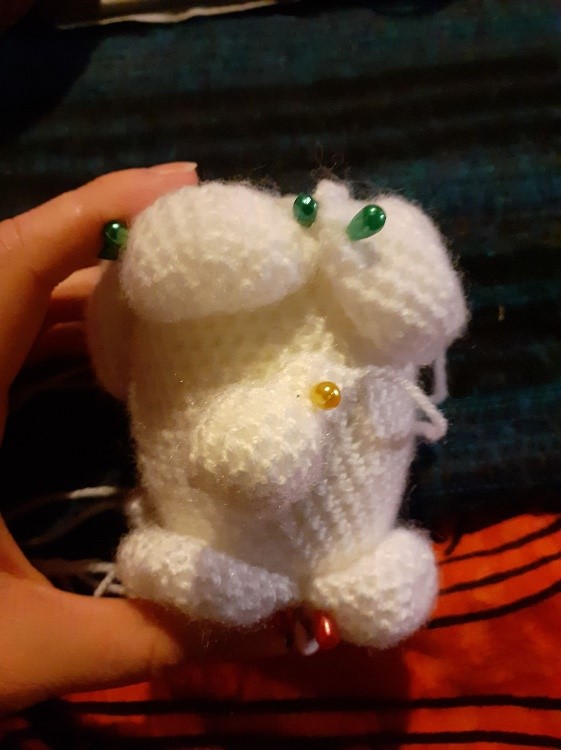
Next, decide where you want the face to be!
Simply pin the large wax drop to the top of the head, around the rim (R6 / R7), then the small “face wax drop” next to it.
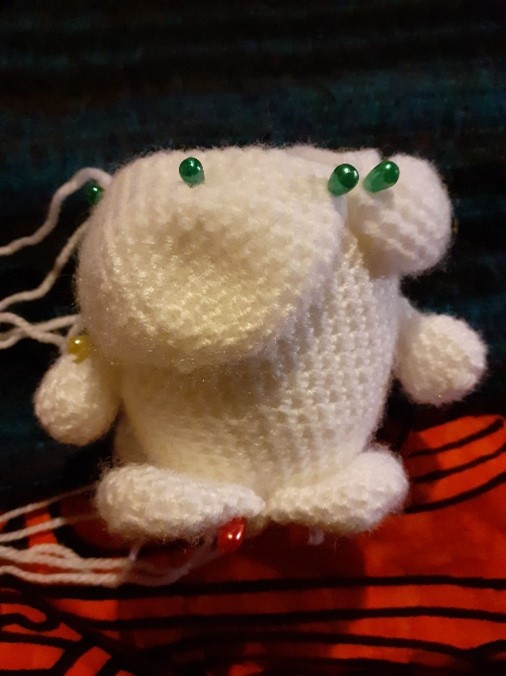
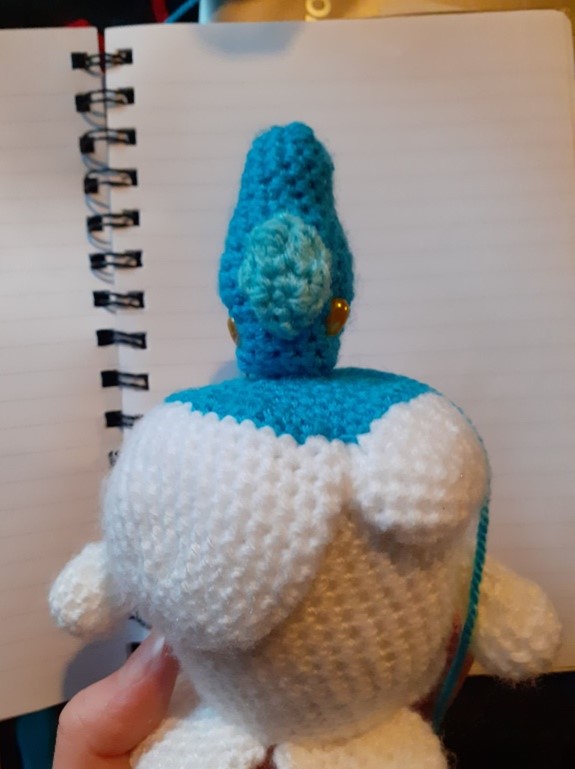
Pin the remaining 2 wax drops to the back of the head and play around with placements until you’re happy, then neatly sew on. Again I found a whip stitch worked the best.
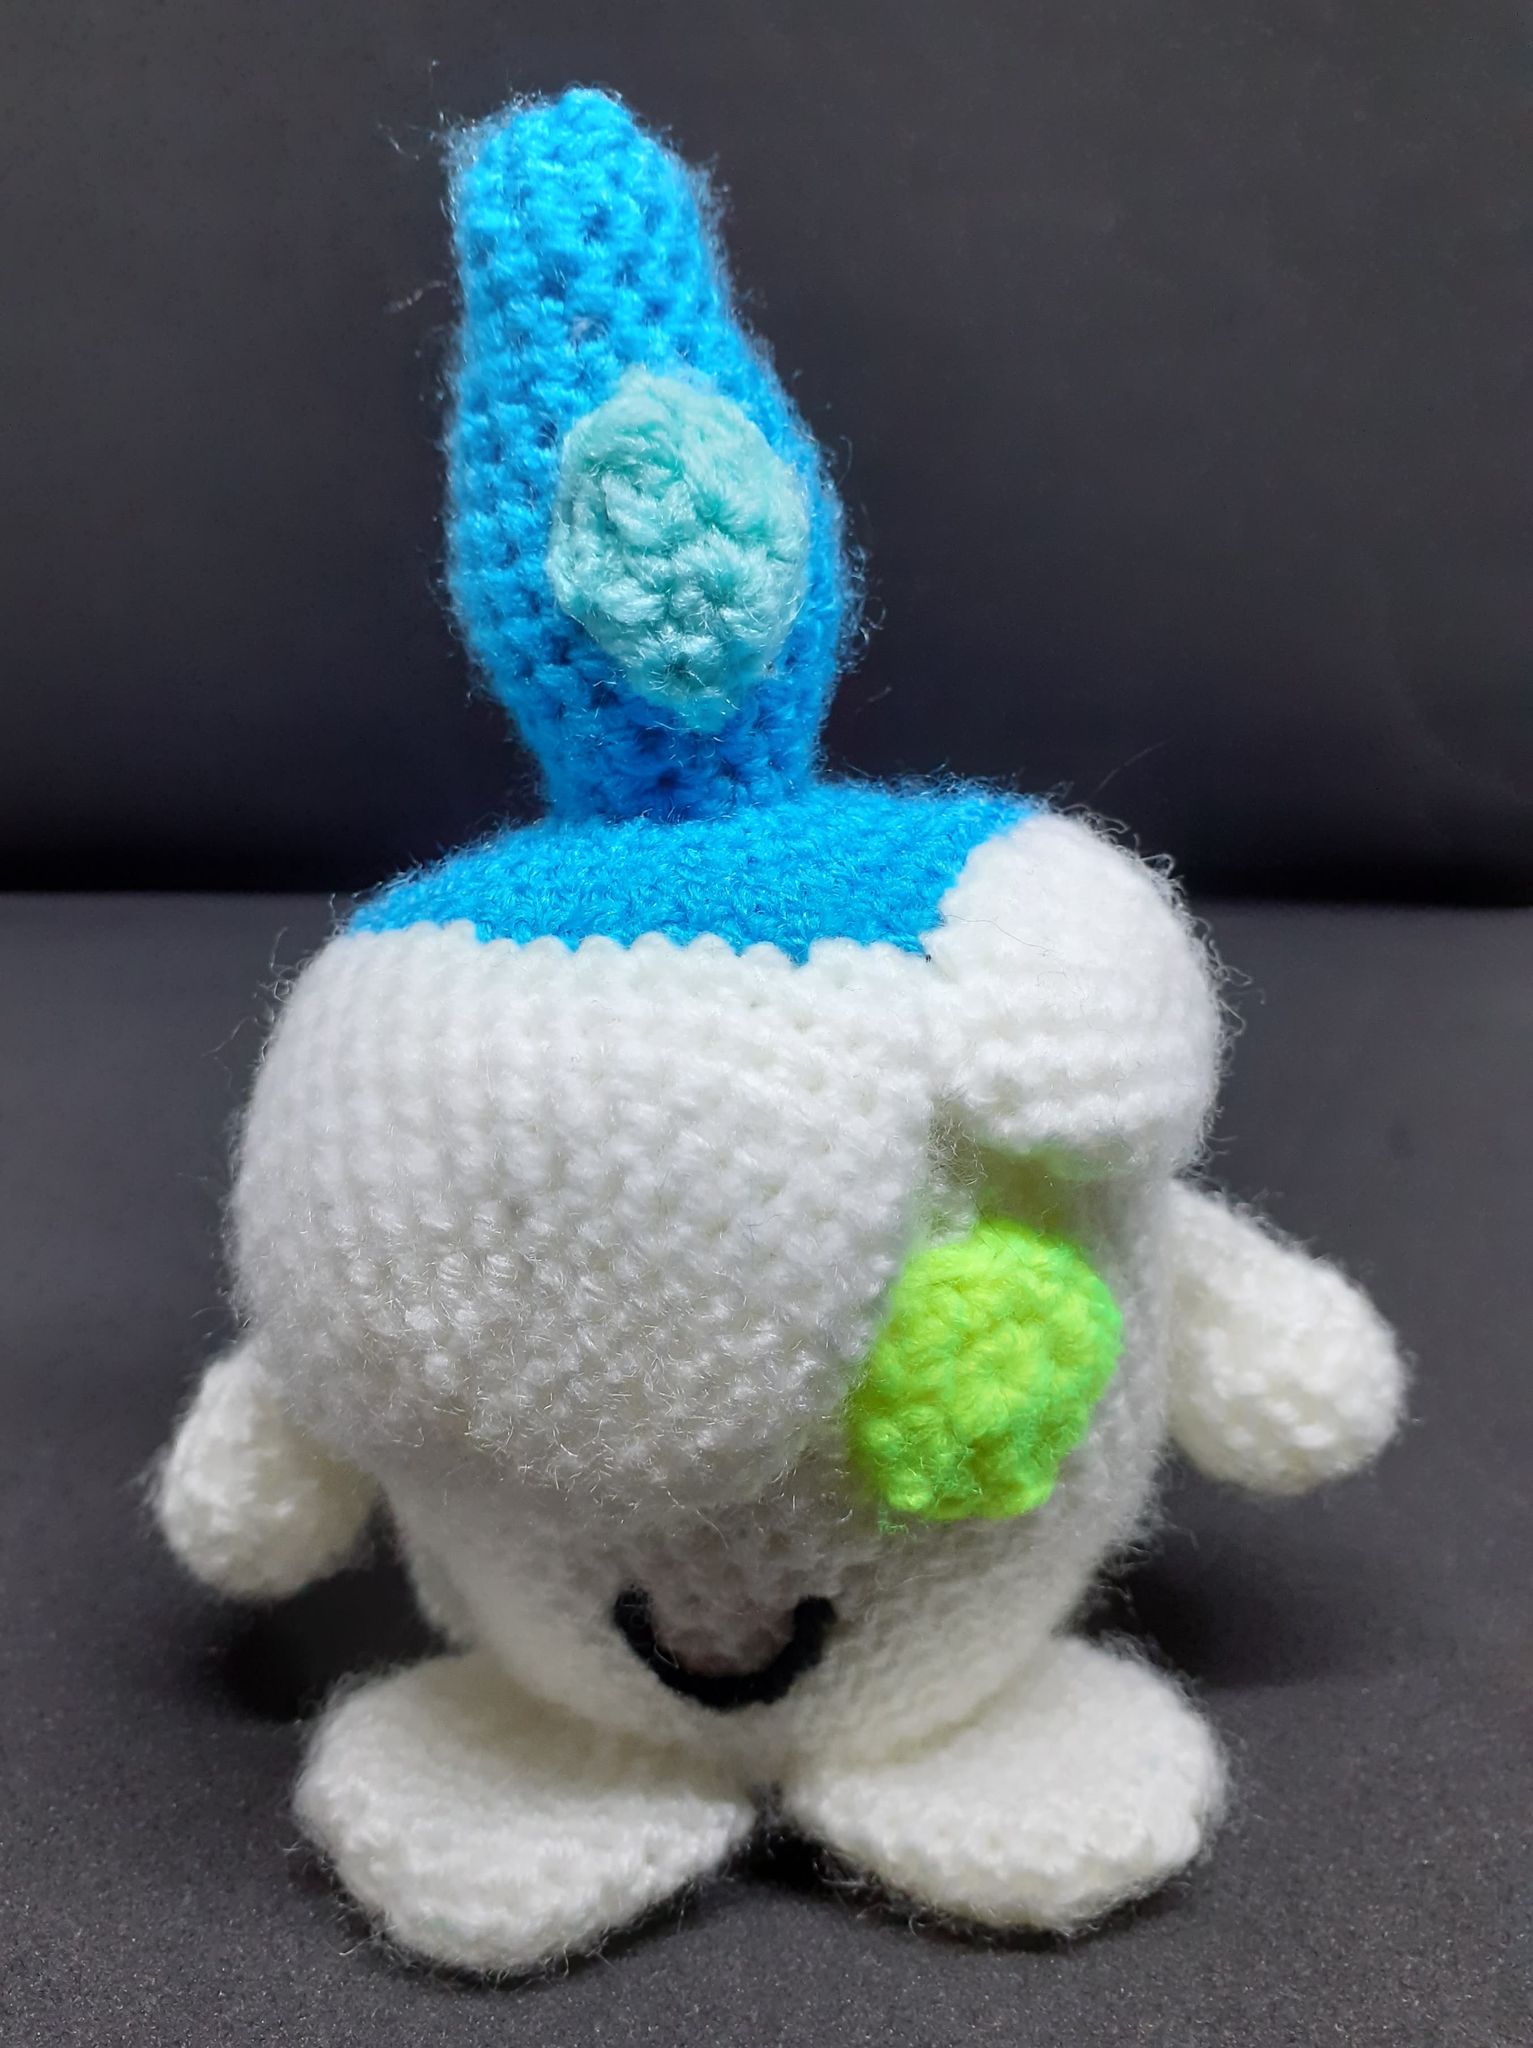
This is the back, please use pictures for reference.
When you're happy with how the Litwick is looking, pin the arms in place and sew when you're ready.
See the photos of the right and left arm below:
Front
Move onto the head cap. Pin it to the top of the
head, if it slightly overlaps the wax drops don’t worry – it gives it more of a
“natural wax melt” look to it,
Sew on when you’re happy.
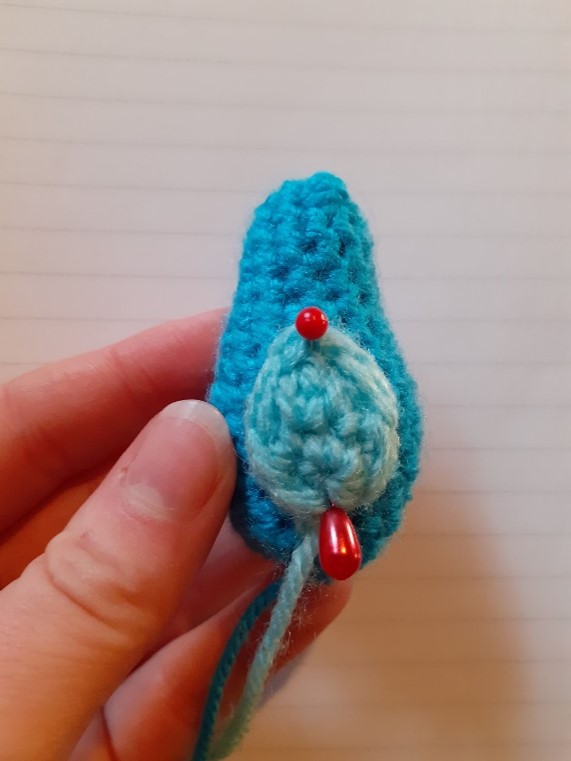
Time to assemble the flame.
Take up the flame detail and pin it to the chunky
middle of the flame, and carefully sew it on. If you chose to use felt, glue on
when you’re happy with placements.
When this is in place, pin the completed flame to
the top of the head in the centre, and neatly sew it in place.
Moving on to the eye now, depending which method you
chose to make the eye, simply glue, sew or work in place just below the smaller
face wax drop.

Make the mouth with your desire method, and work on that smile.
That’s it!
You’re done!
Enjoy your new adorable Litwick!
STEP BY STEP TUTORIAL
Coming soon!
If you have any questions about this pattern, feel free to contact me.
This pattern is property of BlueFoxPaws. Please do not claim or resell this pattern as your own. You can sell the finished product as long as credit is given -BlueFoxPaws-.
Leave a Reply