
SPYRO THE DRAGON CROCHET PATTERN

Spyro the Dragon certainly holds a very special place in my heart, one of my very first games as a child because I was a dragon obsessed little girl, and you know full well that I got the reignited trilogy when it came out a few years ago!
Anyway, this Spyro pattern is long overdue an update, so I will get round to it in time but for now I'll share this pattern with you lovely crafty bunch so you can satisfy that Spyro itch!
Materials
4mm crochet hook
Yarn in purple, yellow and red
Toy stuffing
Felt in black and white OR yarn / yarn fibre in these colours for the eyes.
Abbreviations
SC – Single Crochet
INC – Increase
DEC – Decrease
DBL – Double Crochet
TRB – Treble Crochet
SL – Slip Stitch
** - Repeat around
Pattern
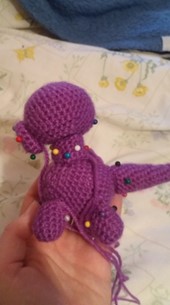
Head – Purple
Magic Ring 6 (6)
1 Inc around (12)
2 *sc, inc* (18)
3 *2 sc, inc* (24)
4 *3 sc, inc* (30)
5 *4 sc, inc* (36)
6 – 10 sc around (36)
11 *4 sc, dec* (30)
12 *3 sc, dec* (24)
13 *2 sc, dec* (18)
14 *sc, dec* (12)
- Finish off, stuff and leave a long tail for sewing
Body – Purple
Magic Ring 6 (6)
1 Inc around (12)
2 *sc, inc* (18)
3 *2 sc, inc* (24)
4 *3 sc, inc* (30)
5 – 10 Sc around (30)
11 *3 sc, dec* (24)
12 *2 sc, dec* (18)
13 *sc, dec* (12)
14 dec around (6)
- Finish off, stuff moderately and leave a long tail for sewing, this end will be Spyro's chest
Neck – Purple
Start with a long tail
Chain 16, sl to the 1st ch to form a circle. (16)
1 – 4 Sc around (16)
- Finish off, leave a long tail for sewing
Nose – Purple
Magic Ring 6 (6)
1 Inc around (12)
2 *2 sc, inc* (16)
3 – 4 Sc around (16)
- Finish off, stuff lightly, leave a long tail for sewing
Legs (x4) – Purple
Magic Ring 6 (6)
1 Inc around (12)
2 – 6 Sc around (12)
- Finish off, stuff and leave a long tail for sewing
Tail – Purple
Magic Ring 6 (6)
1 Sc around (6)
2 *sc, inc* (9)
3 – 4 Sc around (9)
5 *2 sc, inc* (12)
6 – 7 Sc around (12)
8 *3 sc, inc* (15)
9 – 14 Sc around (15)
- Finish off, stuff and leave a long tail for sewing
Tail Cap – Yellow
Magic Ring 6 (6)
1 *sc, inc* (9)
2 Sc around (9)
3 *2 sc, inc* (12)
4 Sc around (12)
5 Dec around (6)
- Finish off, turn inside out and stuff, leave a long tail for sewing
Horns (x2) – Yellow
Magic Ring 4 (4)
1 *sc, inc* (6)
2 Sc around (6)
3 *2 sc, inc* (8)
4 Sc around (8)
5 *3 sc, inc* (10)
6 *4 sc, inc* (12)
- Finish off, turn inside out, stuff lightly and leave a tail for sewing
Neck and Chest – Yellow
Chain 3, sc in 2nd stitch from the hook, sc (2)
1 – 15 Sc across (2)
Sc around the whole outside then finish off, leaving a very long tail for sewing
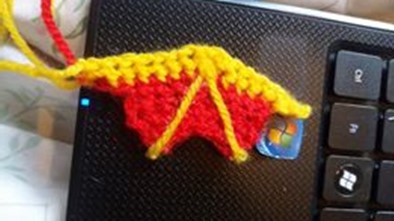
Wings (x2) – Yellow
Start with a long tail, you'll use this to sew the wings on.
Chain 17, slip stitch into the 2nd sc from hook, sc 7, skip a stitch, sc 7
- Change to Red -
Ch 1, turn.
1 inc, sc 6, skip a stitch, sc 5, turn without chaining
2 sc 4, skip a stitch, sc 4, ch 2
3 - 4 dbl, hdc, sc 4, hdc, dbl, ch 1 turn
5 slip stitch down the last row to make it tidy and sturdy
- Finish off, weave in any tail left by the end
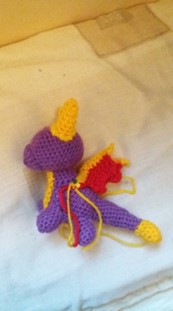
Assembly
All the purple pieces:
Start
by pinning the legs to the body and sew on.
Pin
the tail to the rear of the plush and sew tightly in place.
Next,
pin the nose to the head and start to sew, before you finish sewing it on use
your crochet hook to poke some stuffing into the nose to bulk it out a little, then tightly sew shut.
Pin
the neck to the head, covering the hole at the base of the head. Sew tightly on
and pin the neck and head to the body.
When the neck is pinned in place, sew onto the
body but once again before you finish sewing, use your crochet hook to poke a
tiny amount of stuffing into the neck, then finish sewing closed.
Next, the yellow:
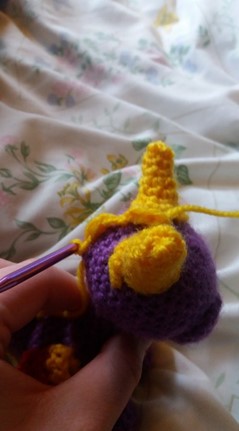
Pin the horns to the top of the head and sew neatly on, then do the same for the tail cap, making sure you sew it on tightly.
Pin the neck and chest piece on, be sure to have the top of the neck piece flush with the neck join.
Sew in place.
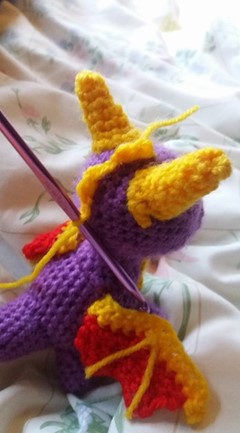
Take the wings and lay them flat, cut off some small pieces of yarn and glue them to the wings so it gives the red skin a split (please refer to picture) – or use a thin piece of yellow felt.
I tried embroidering them on first but it looked too messy, so it’s up to you which way you want to make them.
Finally, pin the
wings to the side of Spyro as this
will make them droop down when he’s standing up.
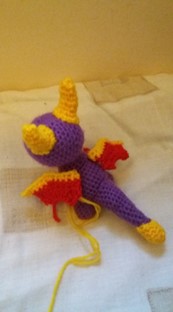
Now, let's make those iconic spikes!
Head and Back spikes – Yellow
IMPORTANT: Only do this part when Spyro has been sewn together
Slip stitch onto the back of the head (between the horns)
Hdc, dbl, sl, sl – Repeat this until you’ve gone from the back of the head, between the wings and down towards the tail. Finish off when there’s about 1cm from the yellow tail cap.
Finally, to make the eyes either use felt or needle felt them on. You need a large base of white and a black pupil.
If you're crocheting them play around with Magic Ring sizes. For this pattern I needle felted mine.
That’s it! You’re done!
Enjoy your new adorable Spyro!
STEP BY STEP TUTORIAL
Coming soon!
If you have any questions about this pattern, feel free to contact me.
This pattern is property of BlueFoxPaws. Please do not claim or resell this pattern as your own. You can sell the finished product as long as credit is given -BlueFoxPaws-.
Leave a Reply