
SHINY CHARM CROCHET PATTERN
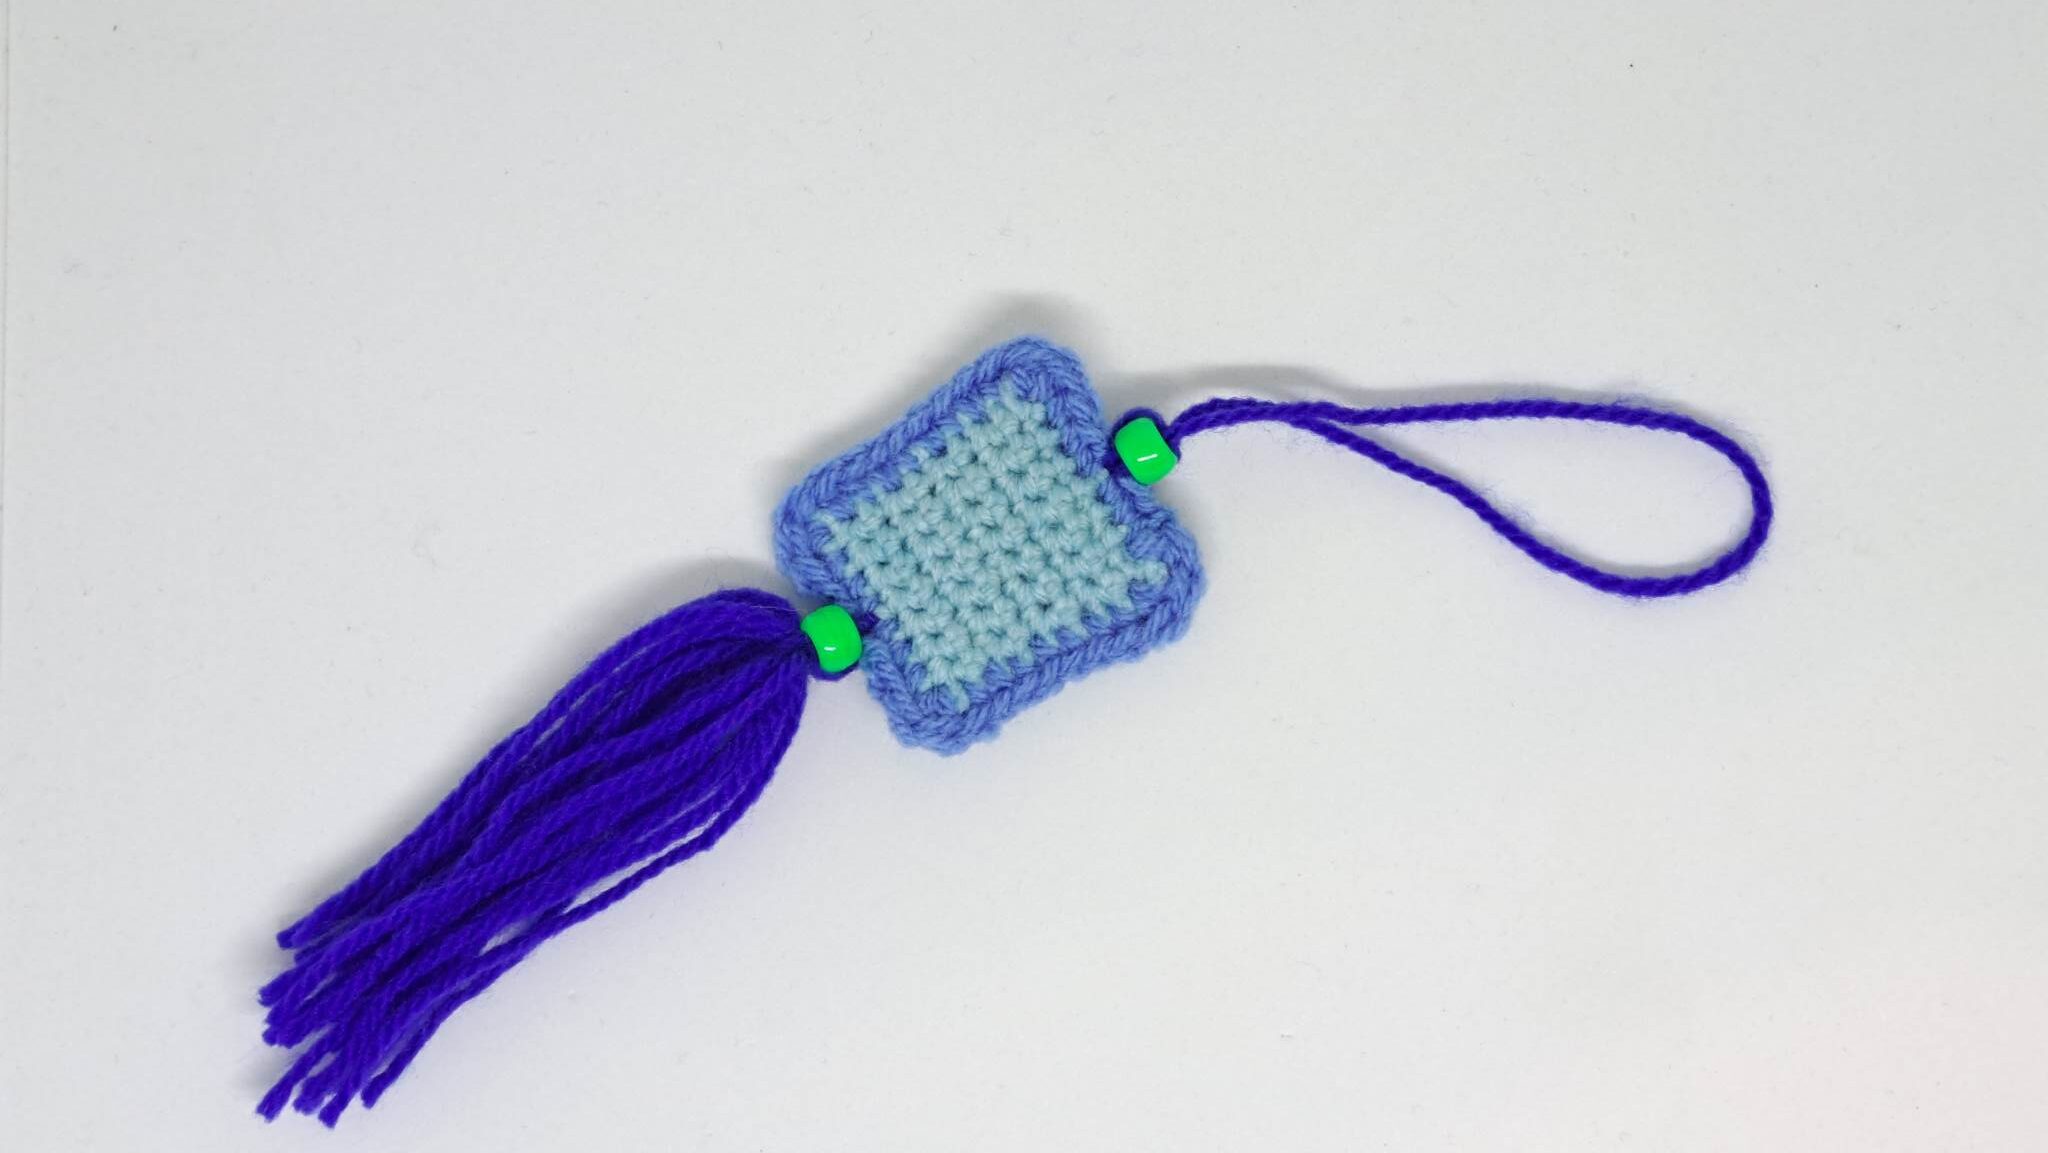
The Shiny Charm, an absolute must-have for hunting those ever elusive Shiny Pokémon!
This one was a great suggestion by one of my best friends quite a while back, the design made me wonder if it would be possible - it's not perfect but I love how my version of the charm worked out!
I've since made quite a few of these charms and handed them out to my local Pokémon GO players who meet up for events in game etc. I always wear one on my bag for community days and I swear it brings me luck for getting all the shiny pokes...
So! Let's jump into how to make one! They work up really quickly which is a huge bonus, these charms do go down a treat with Pokemon fans.
Materials
3mm crochet hook
4 ply yarn in pale blue, blue and dark blue
2x bright green pony beads
Tapestry / Embroidery needle
Abbreviations:
SC – Single Crochet
HDC – Half Double Crochet
DBL – Double Crochet
Pattern
Charm base (x2) - Light Blue
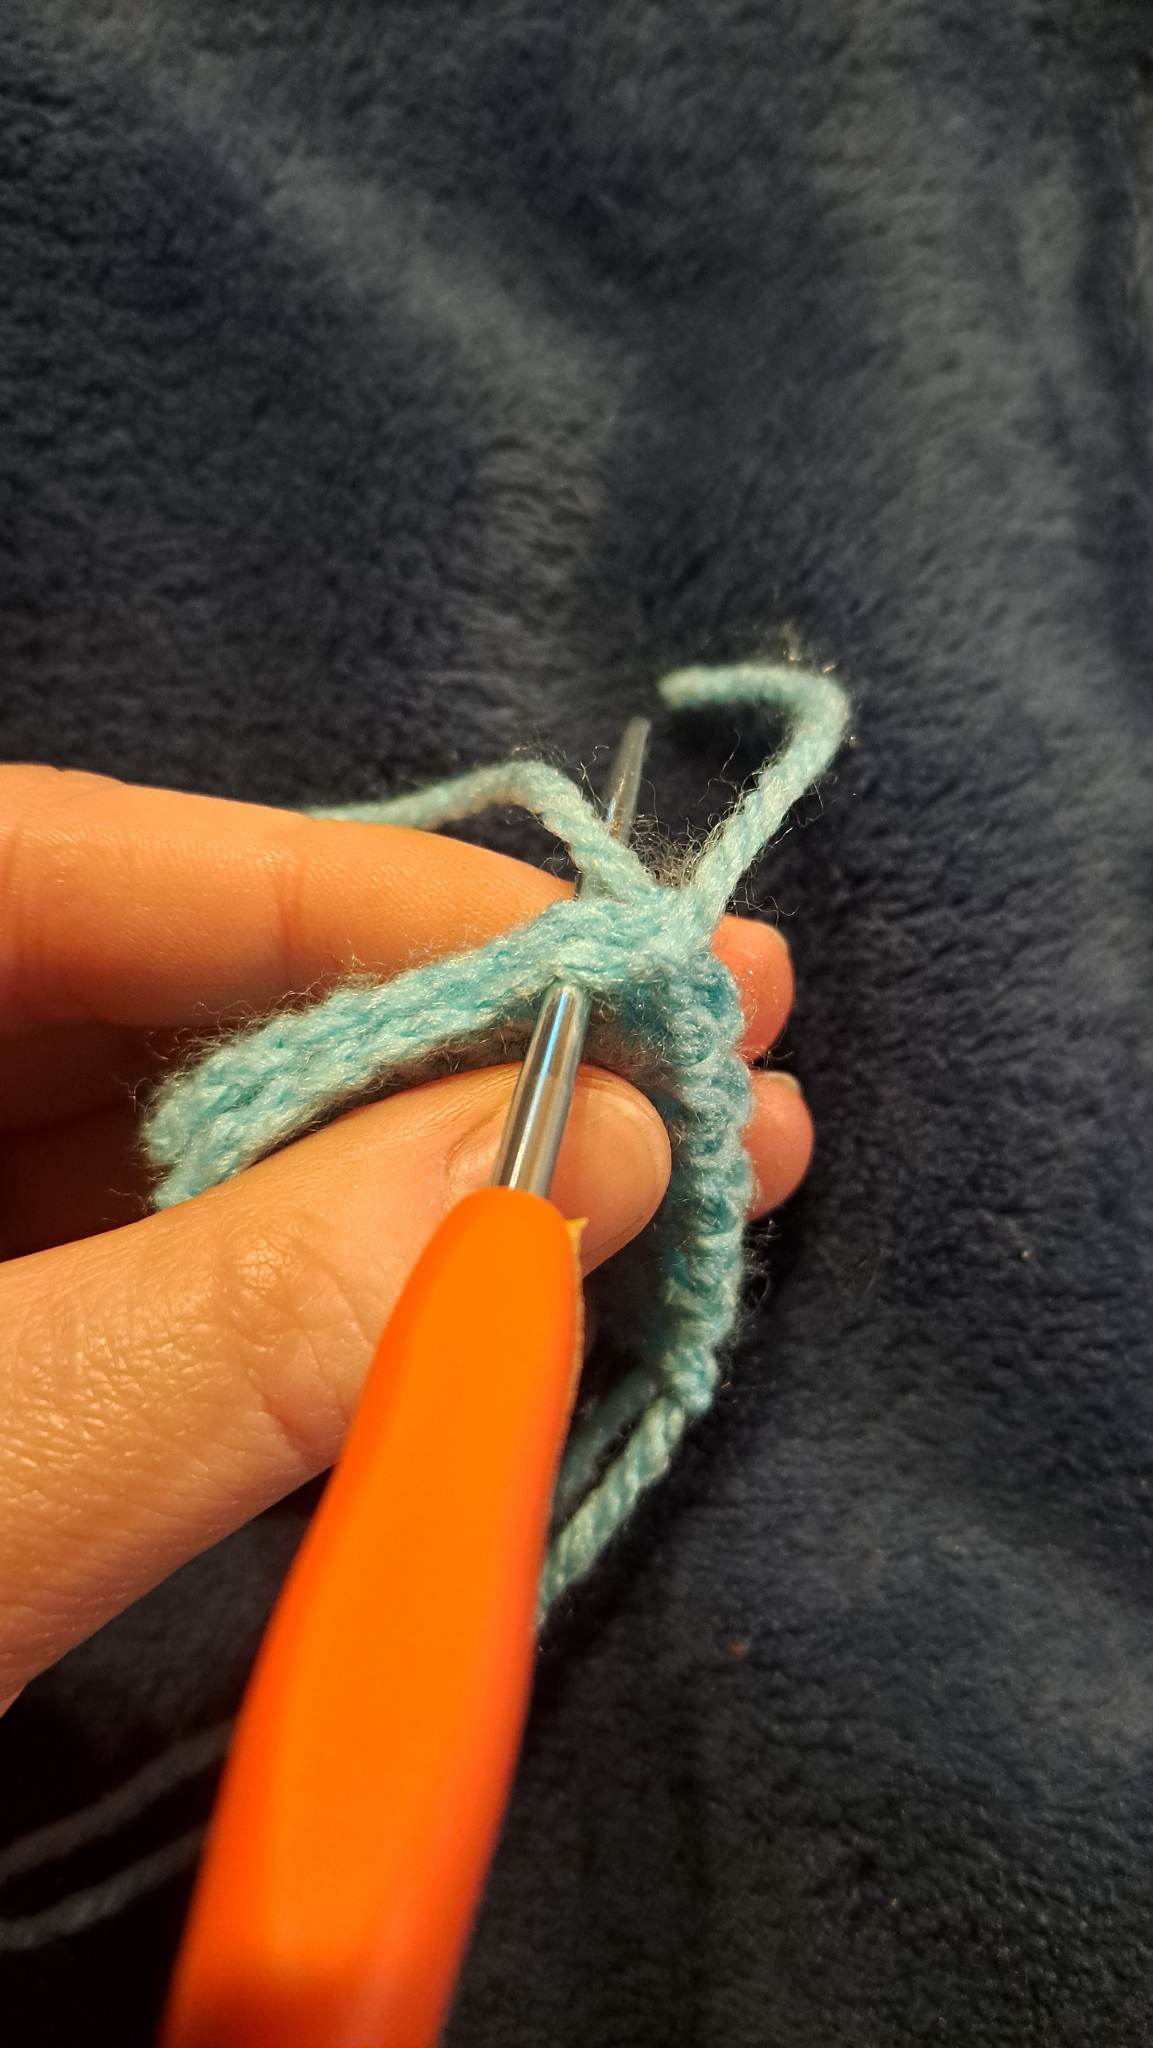
Chain 9, sc in the 2nd loop from the hook, sc back down to the starting ch (8)
1 – 8 Sc across (8)
- Finish off
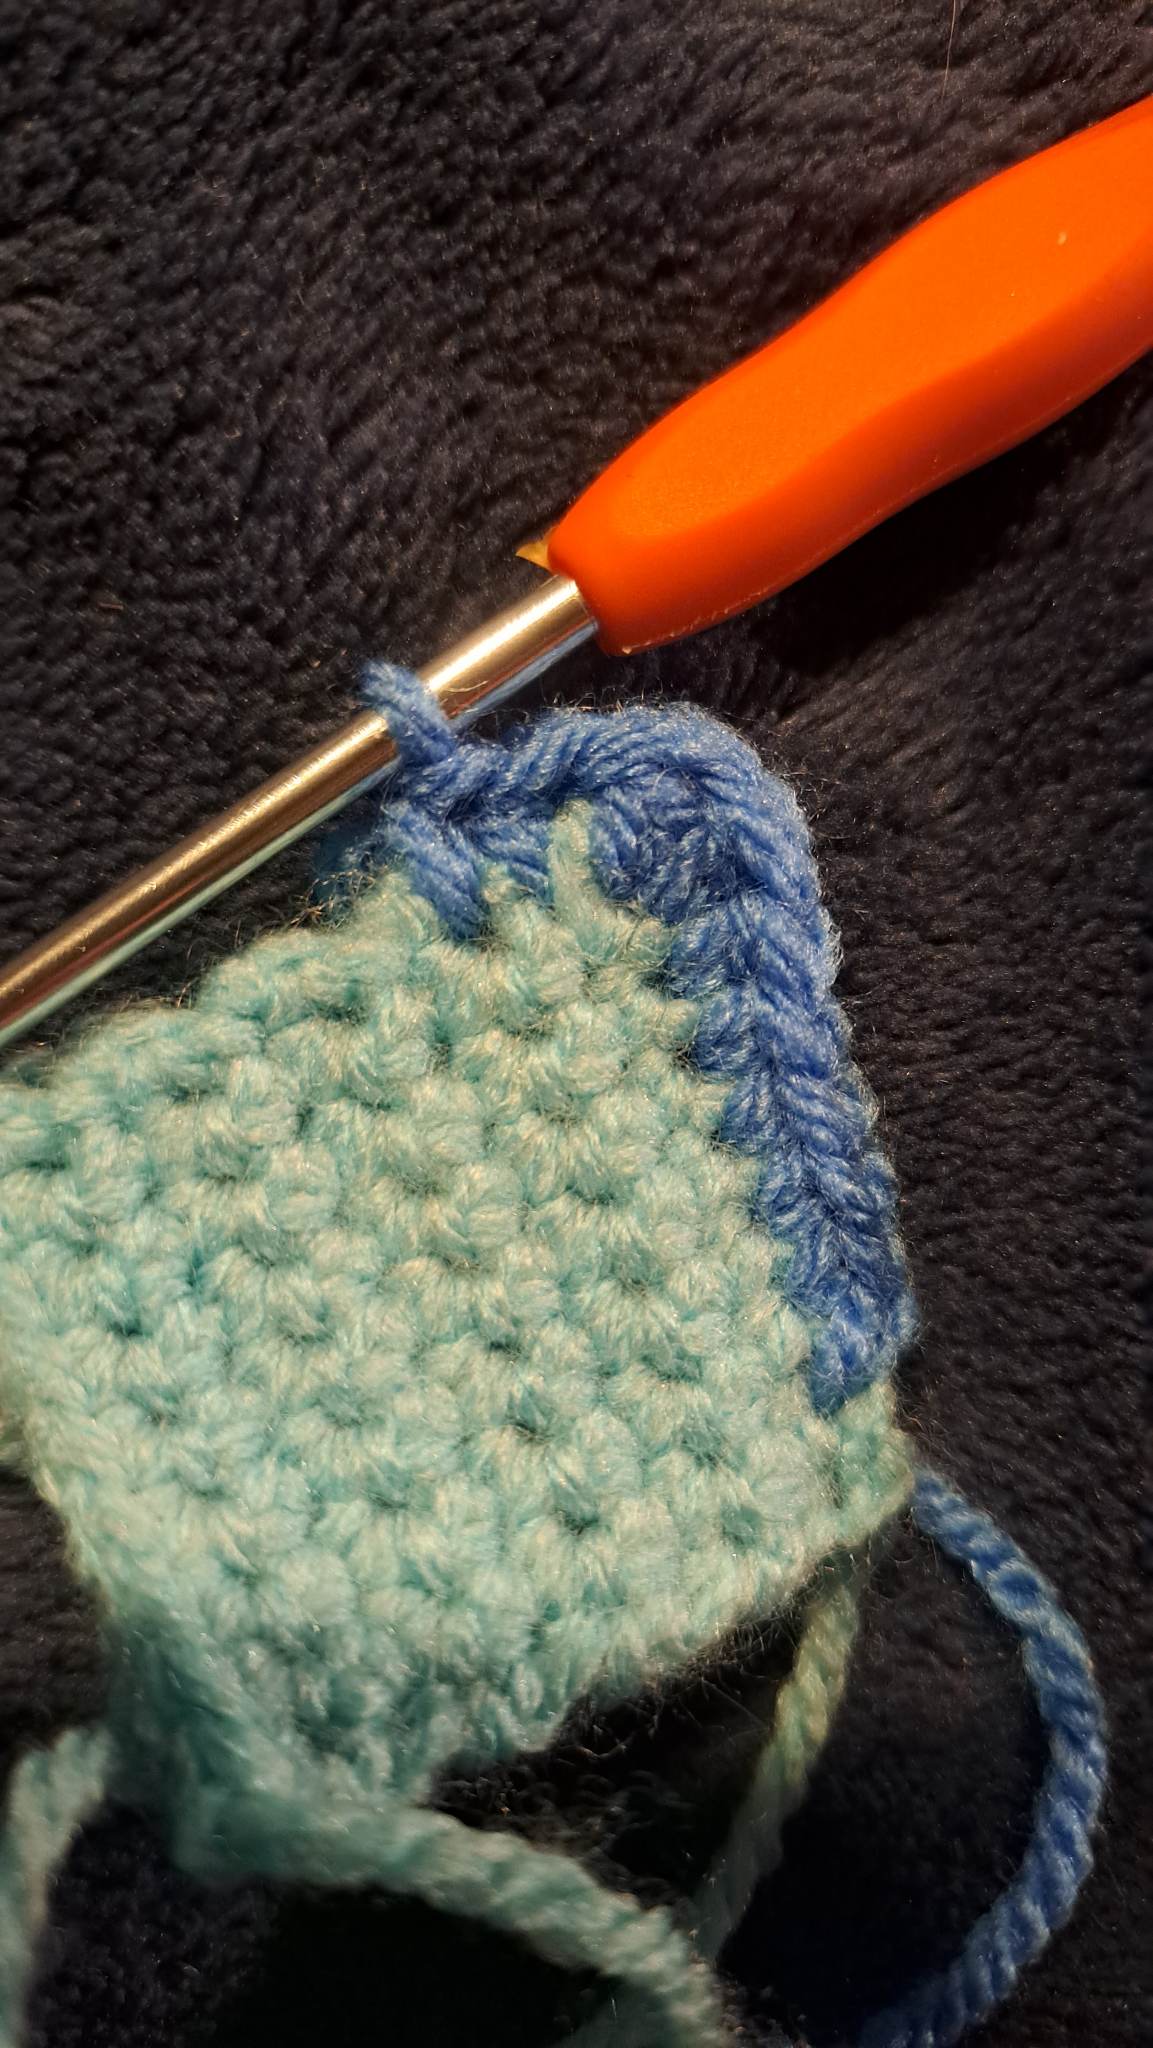
Take up both base pieces and hold them together. Identify where the start point of both pieces are and work from there.
Working anti-clockwise, insert the hook not in the corner of the squares, but one stitch to the left. Make sure your hook goes through both base pieces as we’ll be crocheting them together.

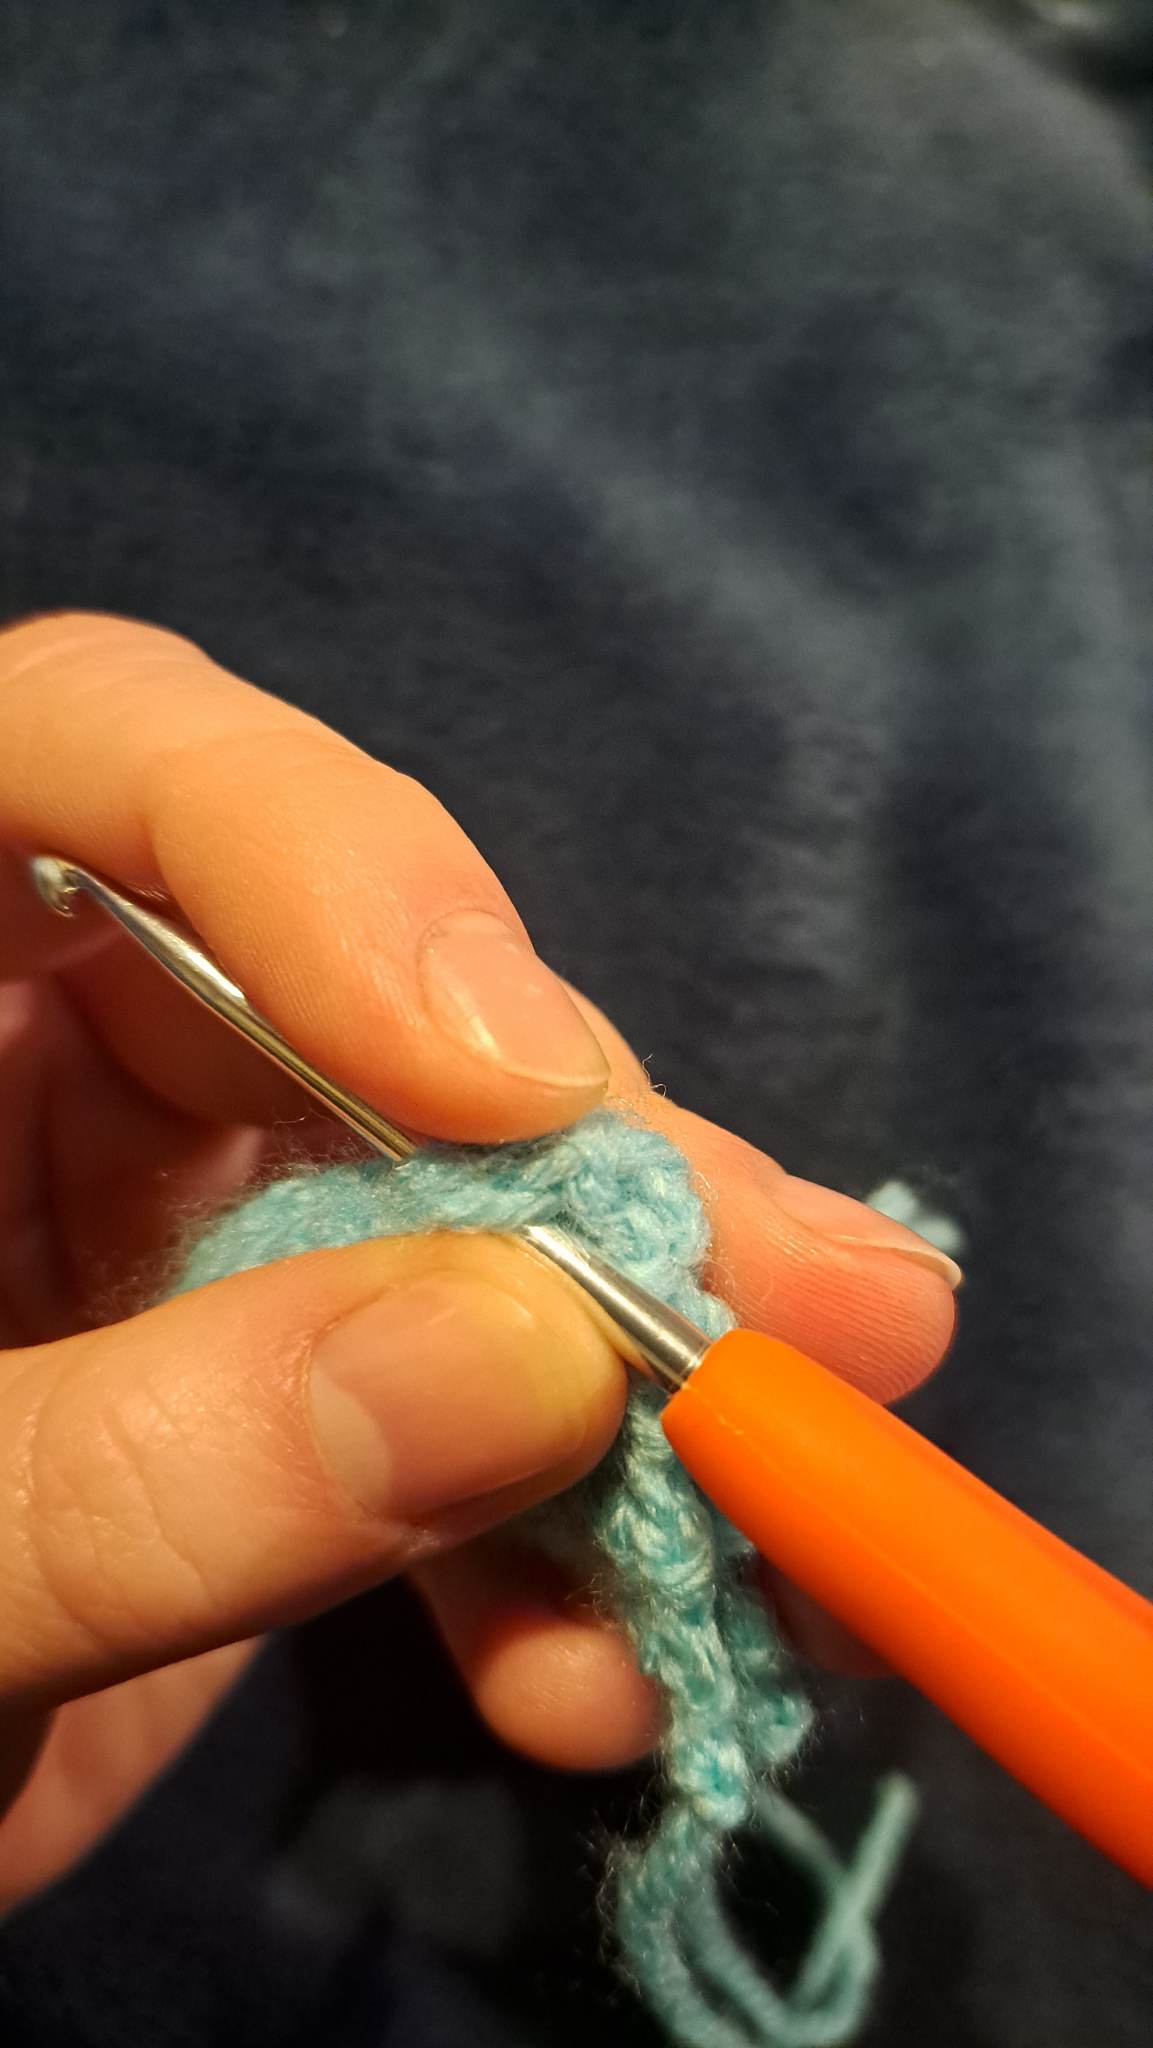
Working with your Blue yarn, pull it through both base pieces then chain 1.
Next,
sc across until you get to one stitch before the corner. In the next stitch,
pop a HDC in there, then on the corner work 2 DBL in the corner stitch (this
makes a DBL increase).

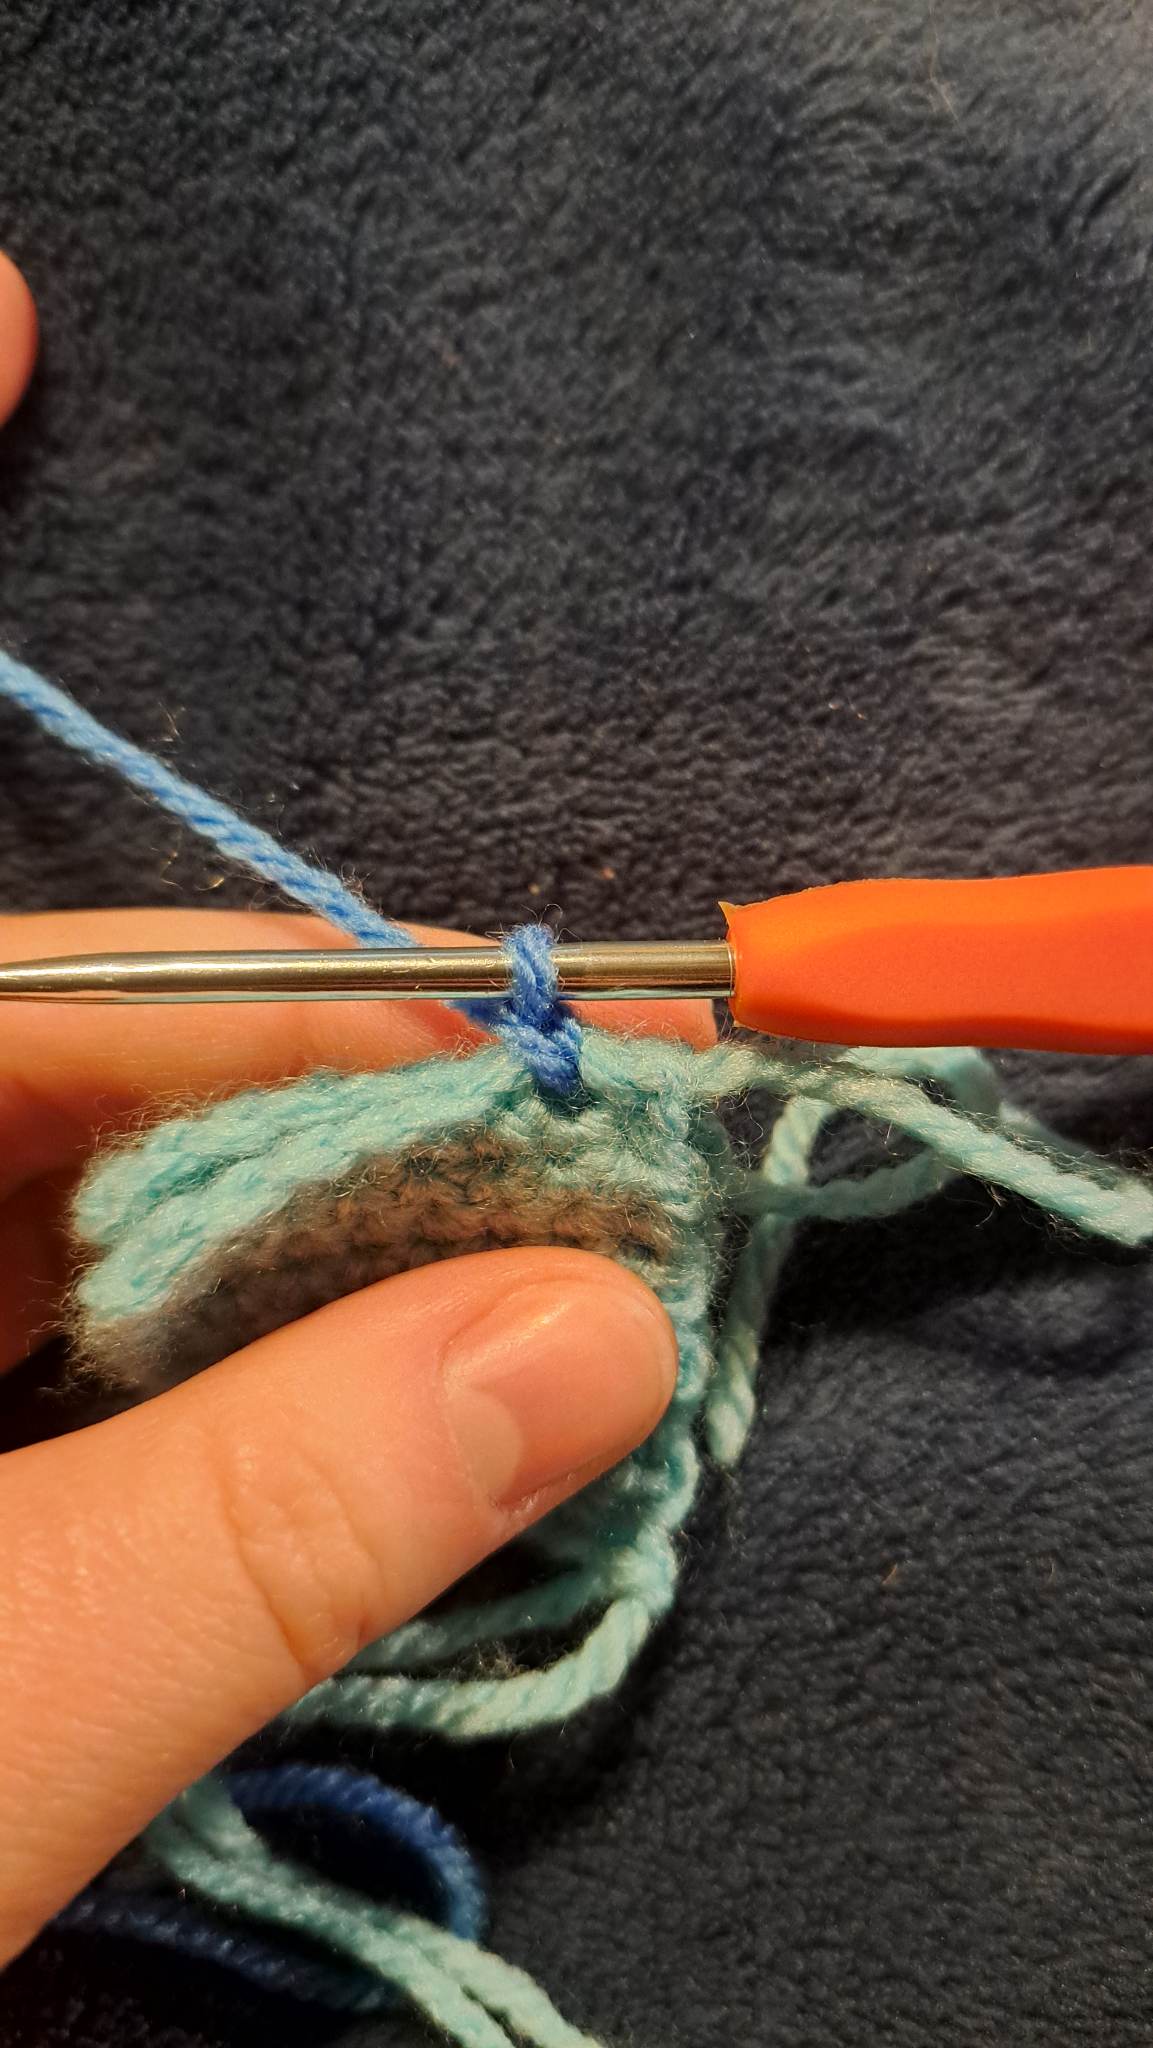
Now we’re working on
the next side. HDC in the next stitch, then sc across towards the next corner.
One stitch before the corner, HDC, then 2 DBL in the corner, HDC in the next
stitch and repeat until you’ve worked all the way around the square. Tuck the
base start and end tails in as you work.
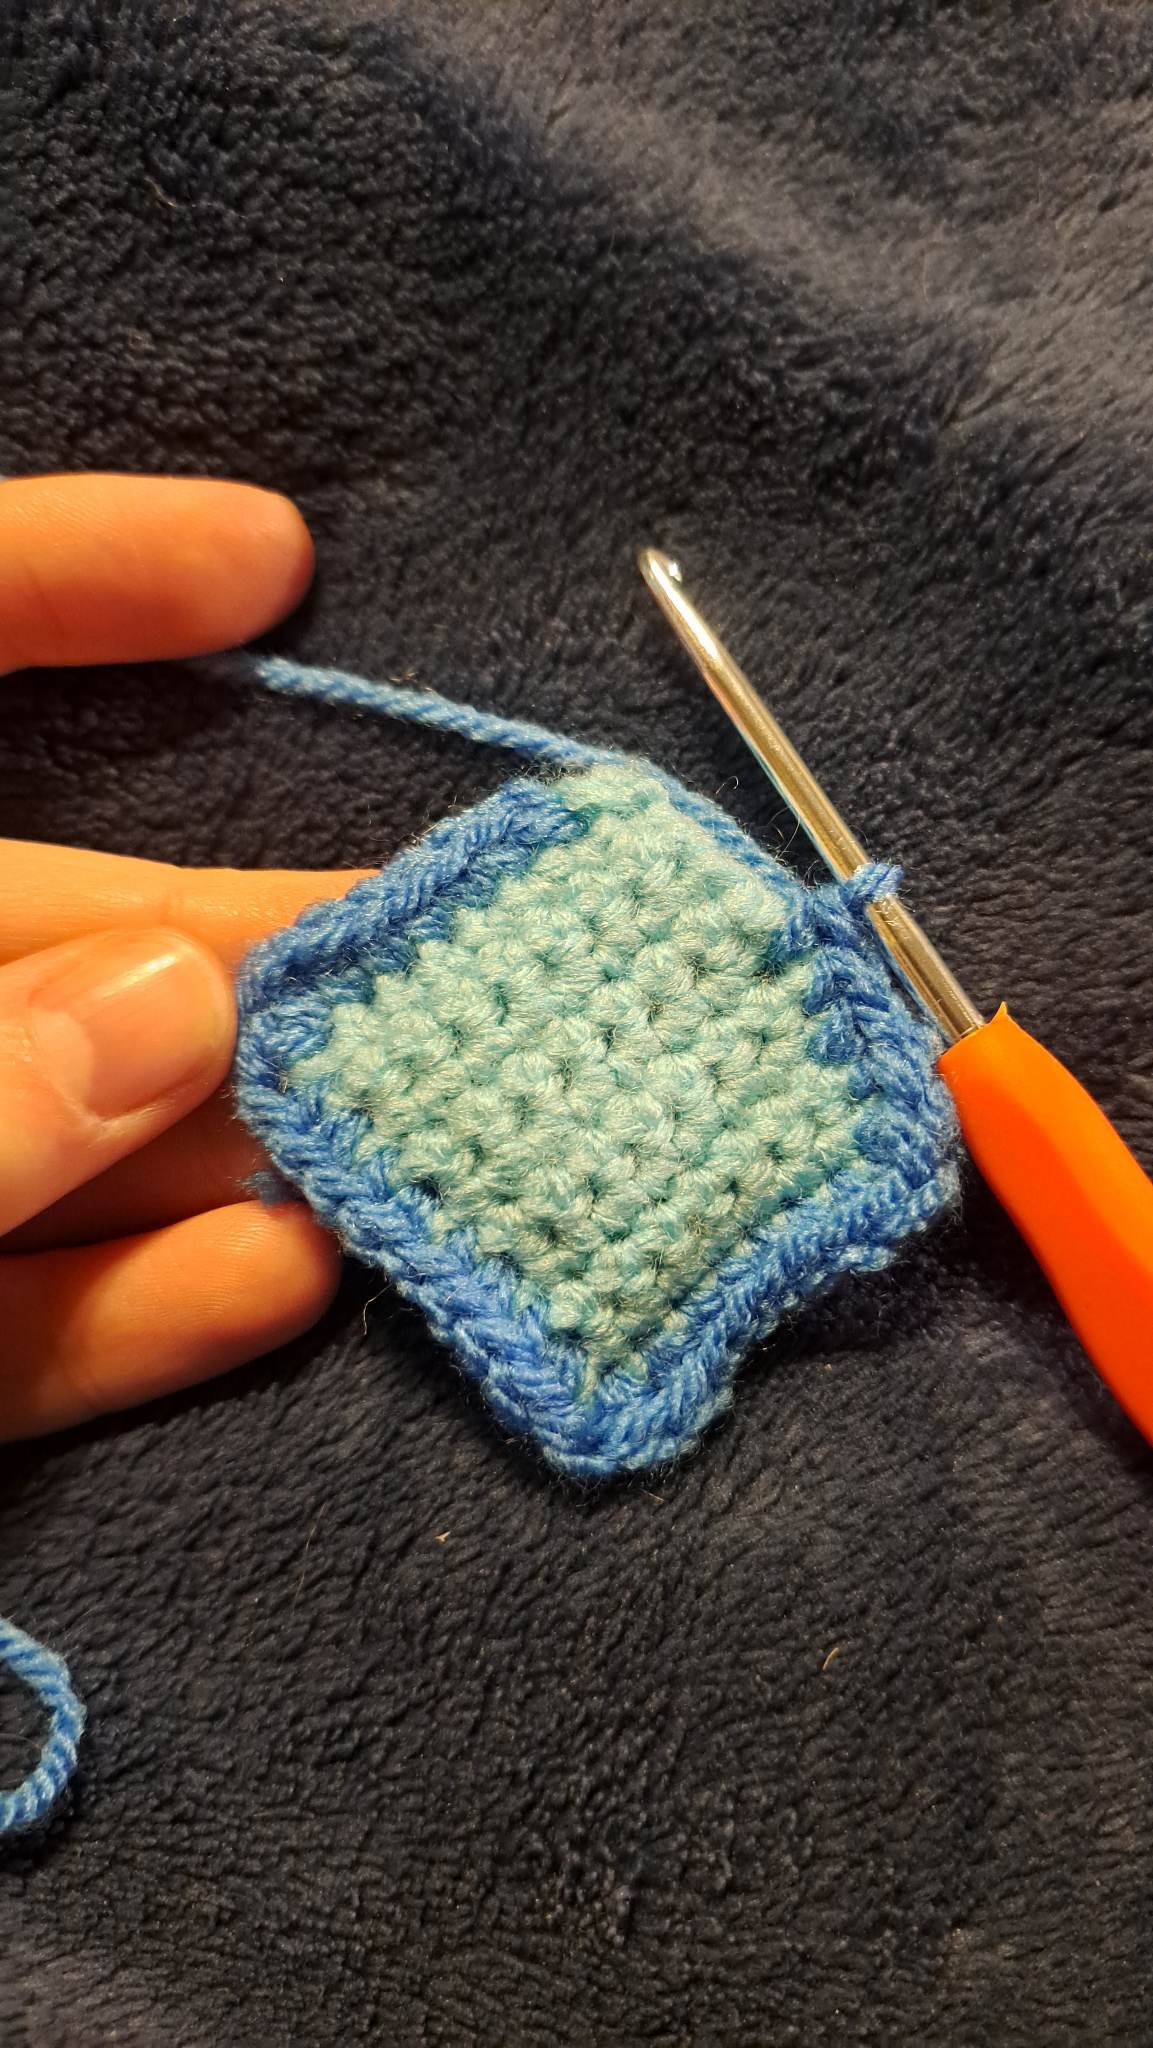
When you’ve made it
all the way around and ended with the HDC, join to the starting chain with a
slip stitch.
Next,
take up one of the pony beads and thread up a long strand of Dark Blue yarn.
Insert
the bead onto the needle and thread the needle through the back of the top of
the charm.
Make
sure you leave a good few inches of the yarn tail loose as you’ll use that to
secure the whole thing at the end.
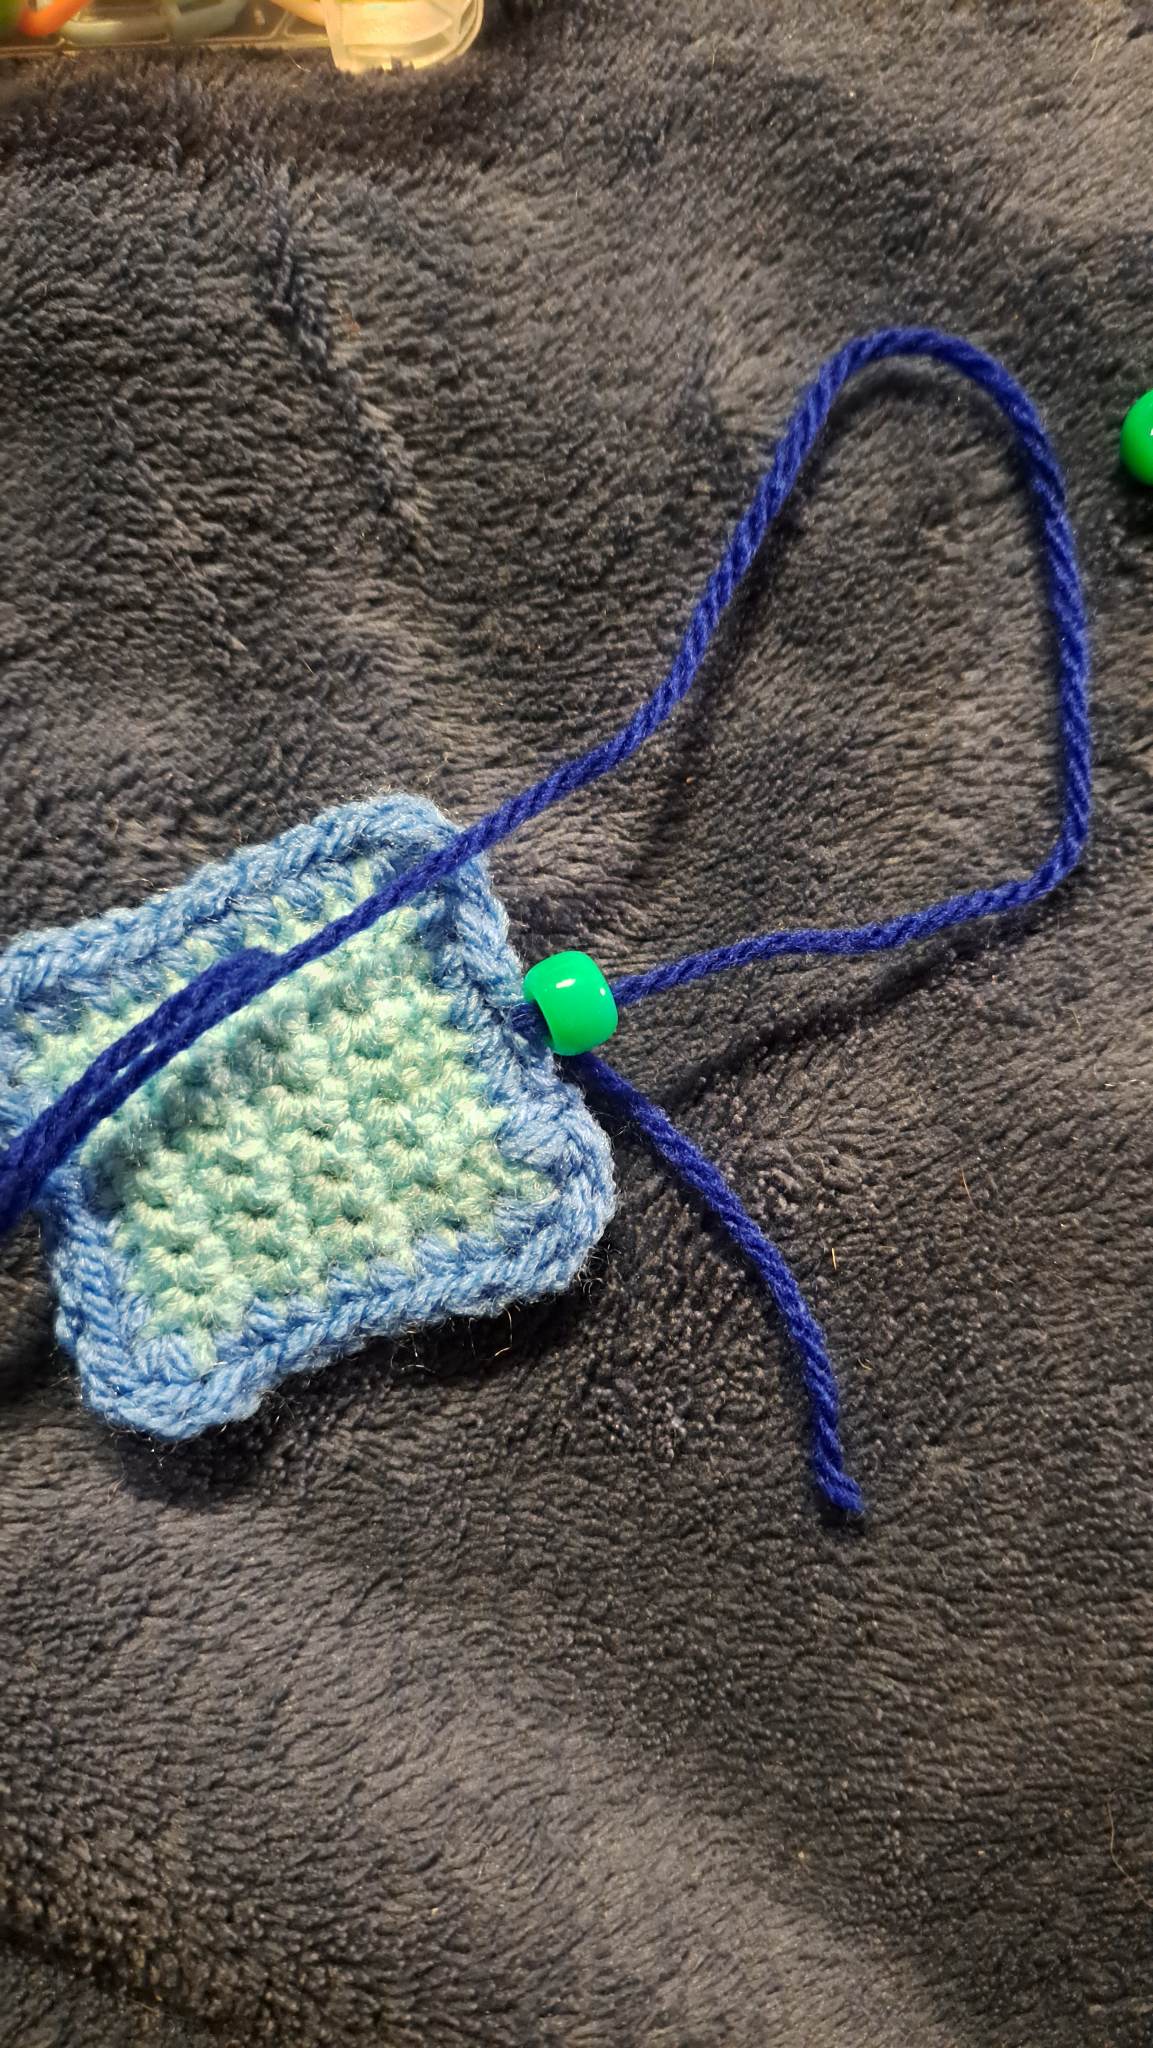
Next, thread the needle back through the back of the charm and pull tight. Don’t forget to hold that tail so you don’t lose it!
Thread the needle up through the bead and then through the back of the charm again to start and secure the bead.
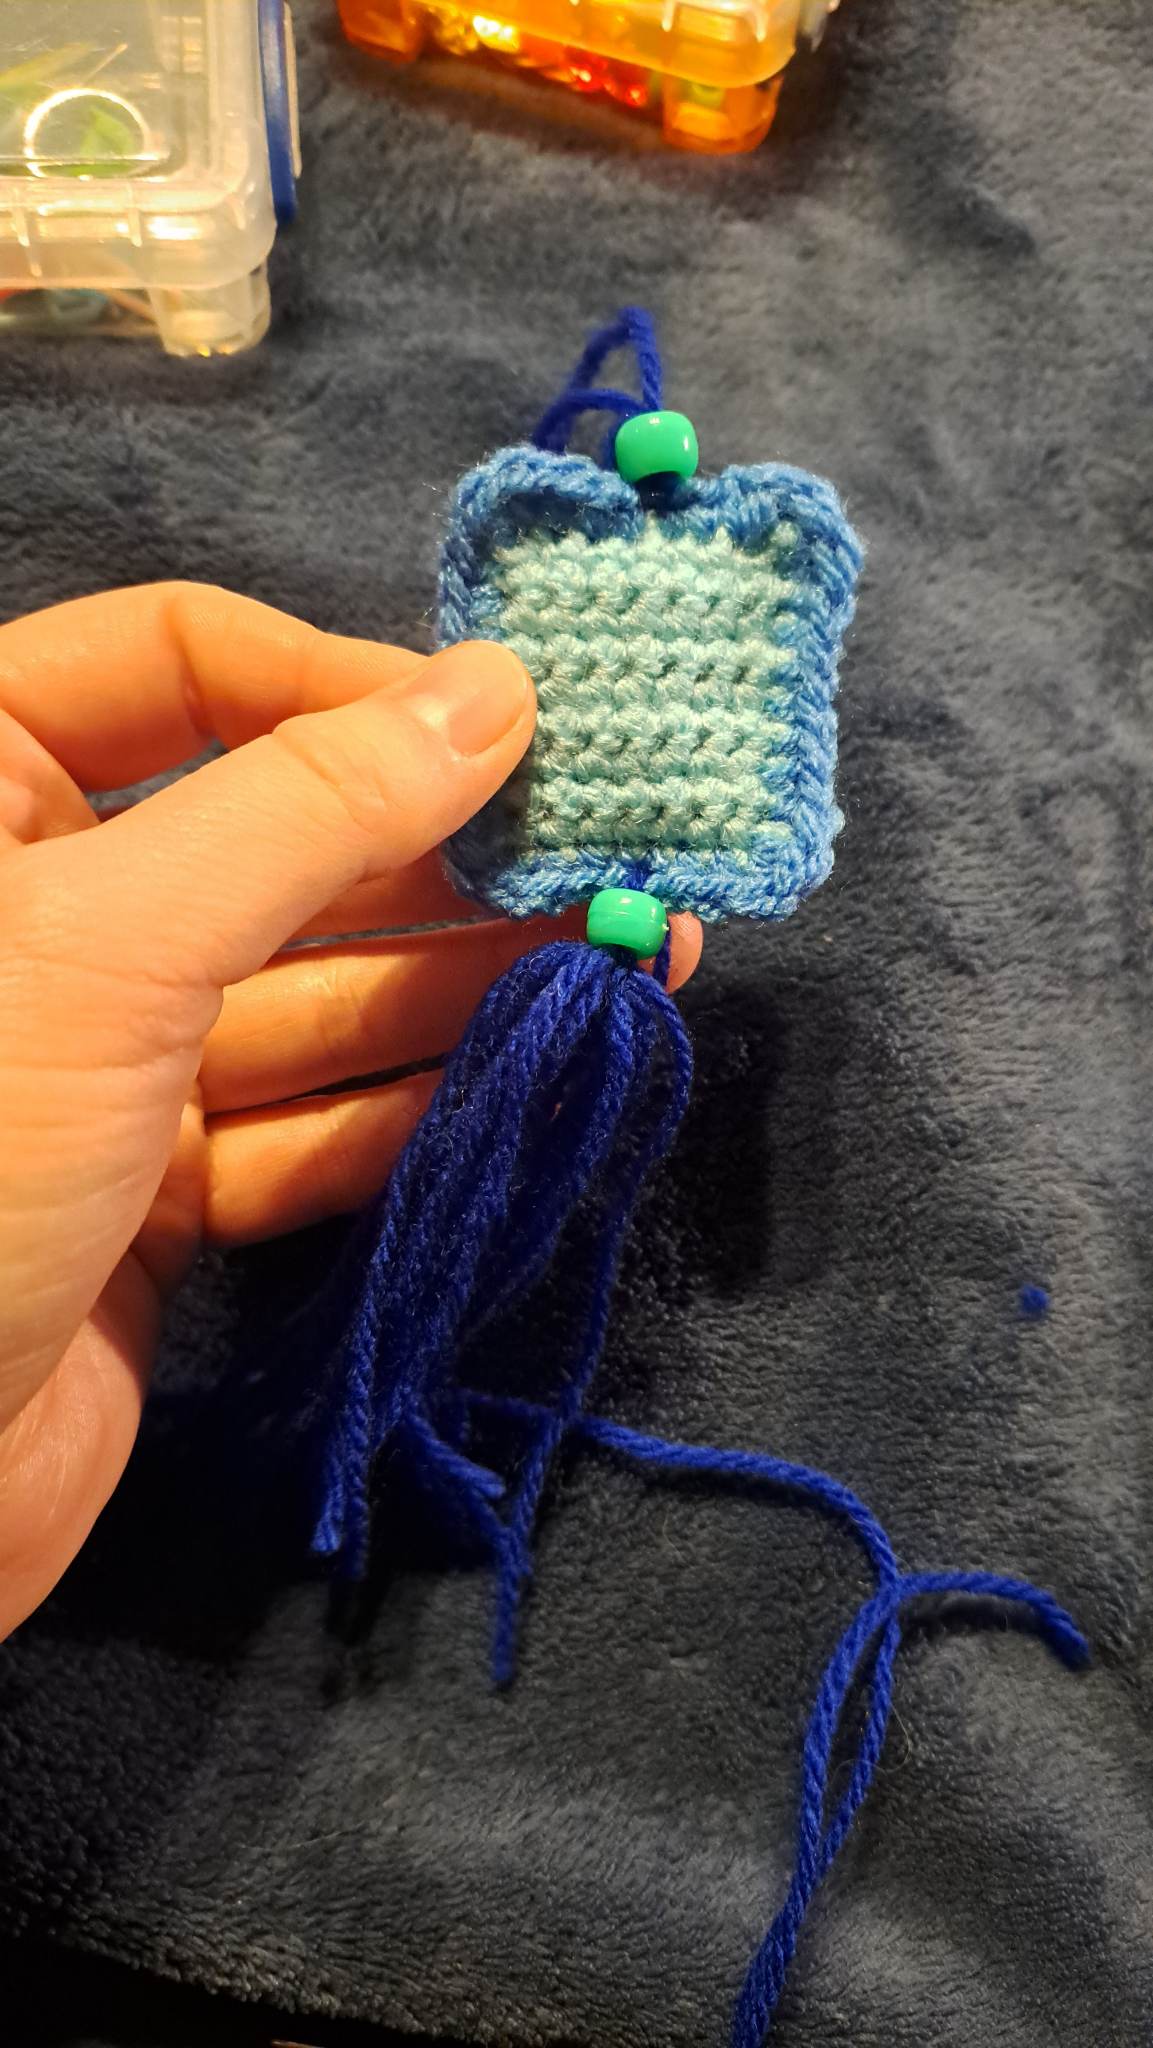
Work
up through the bead again and choose your desired length for the top of the
charm. (See photo below)
Thread
the needle down through the bead making sure you don’t lose the loop length and
work through the front of the charm.
Work
up through the bead then through the charm two more times to really secure
everything.
Pull
both the yarn tails nice and tight to make sure nothing moves, then tie them
together to secure and thread them into the charm to hide them.

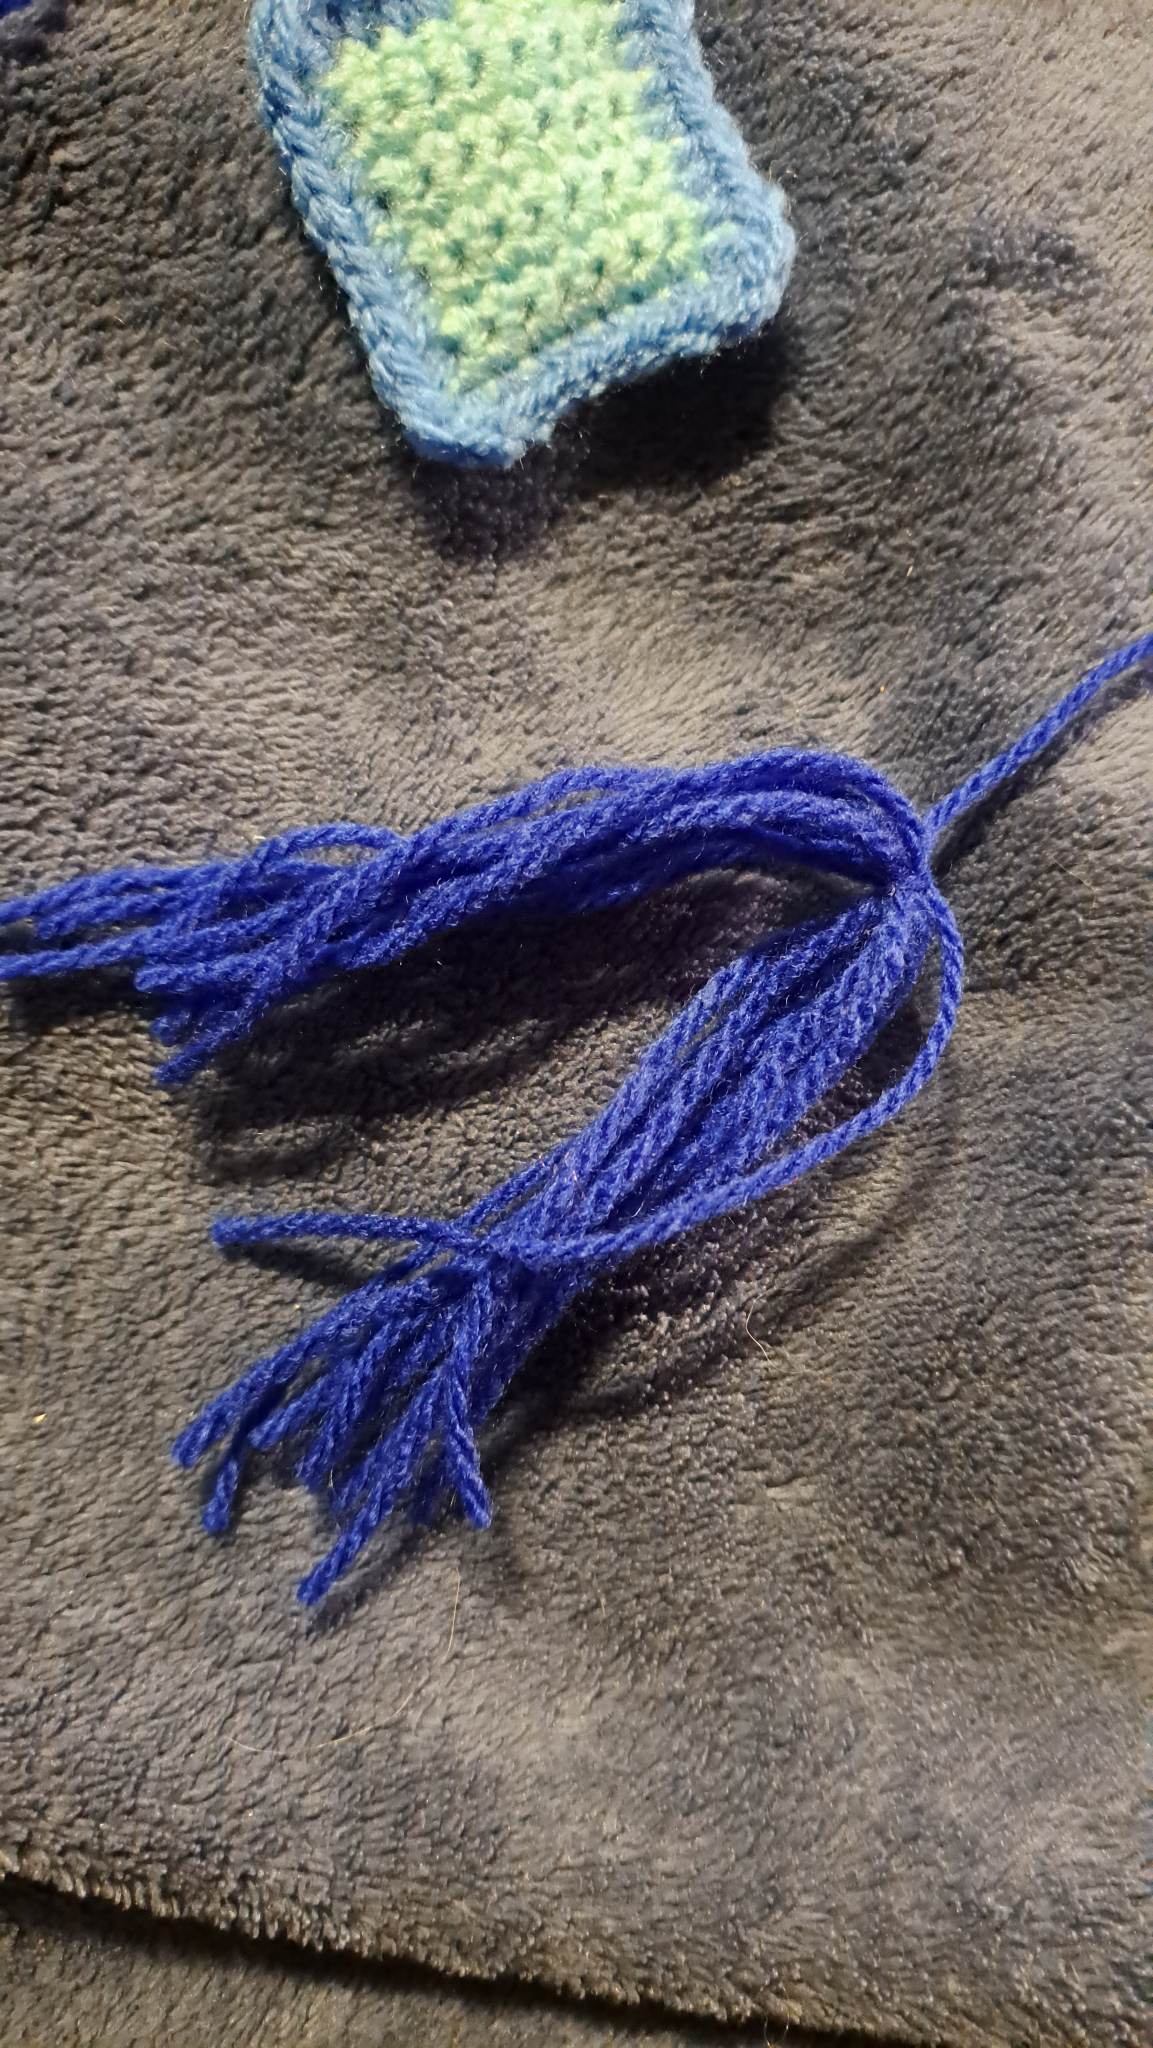
For the bottom of the charm, take up between 5-10 strands of Dark Blue yarn (I found 8 worked perfectly fine) roughly 15cm long. Snip of a long piece of Dark Blue yarn to work with and tie a secure knot in the middle of the strands to start the tassel.
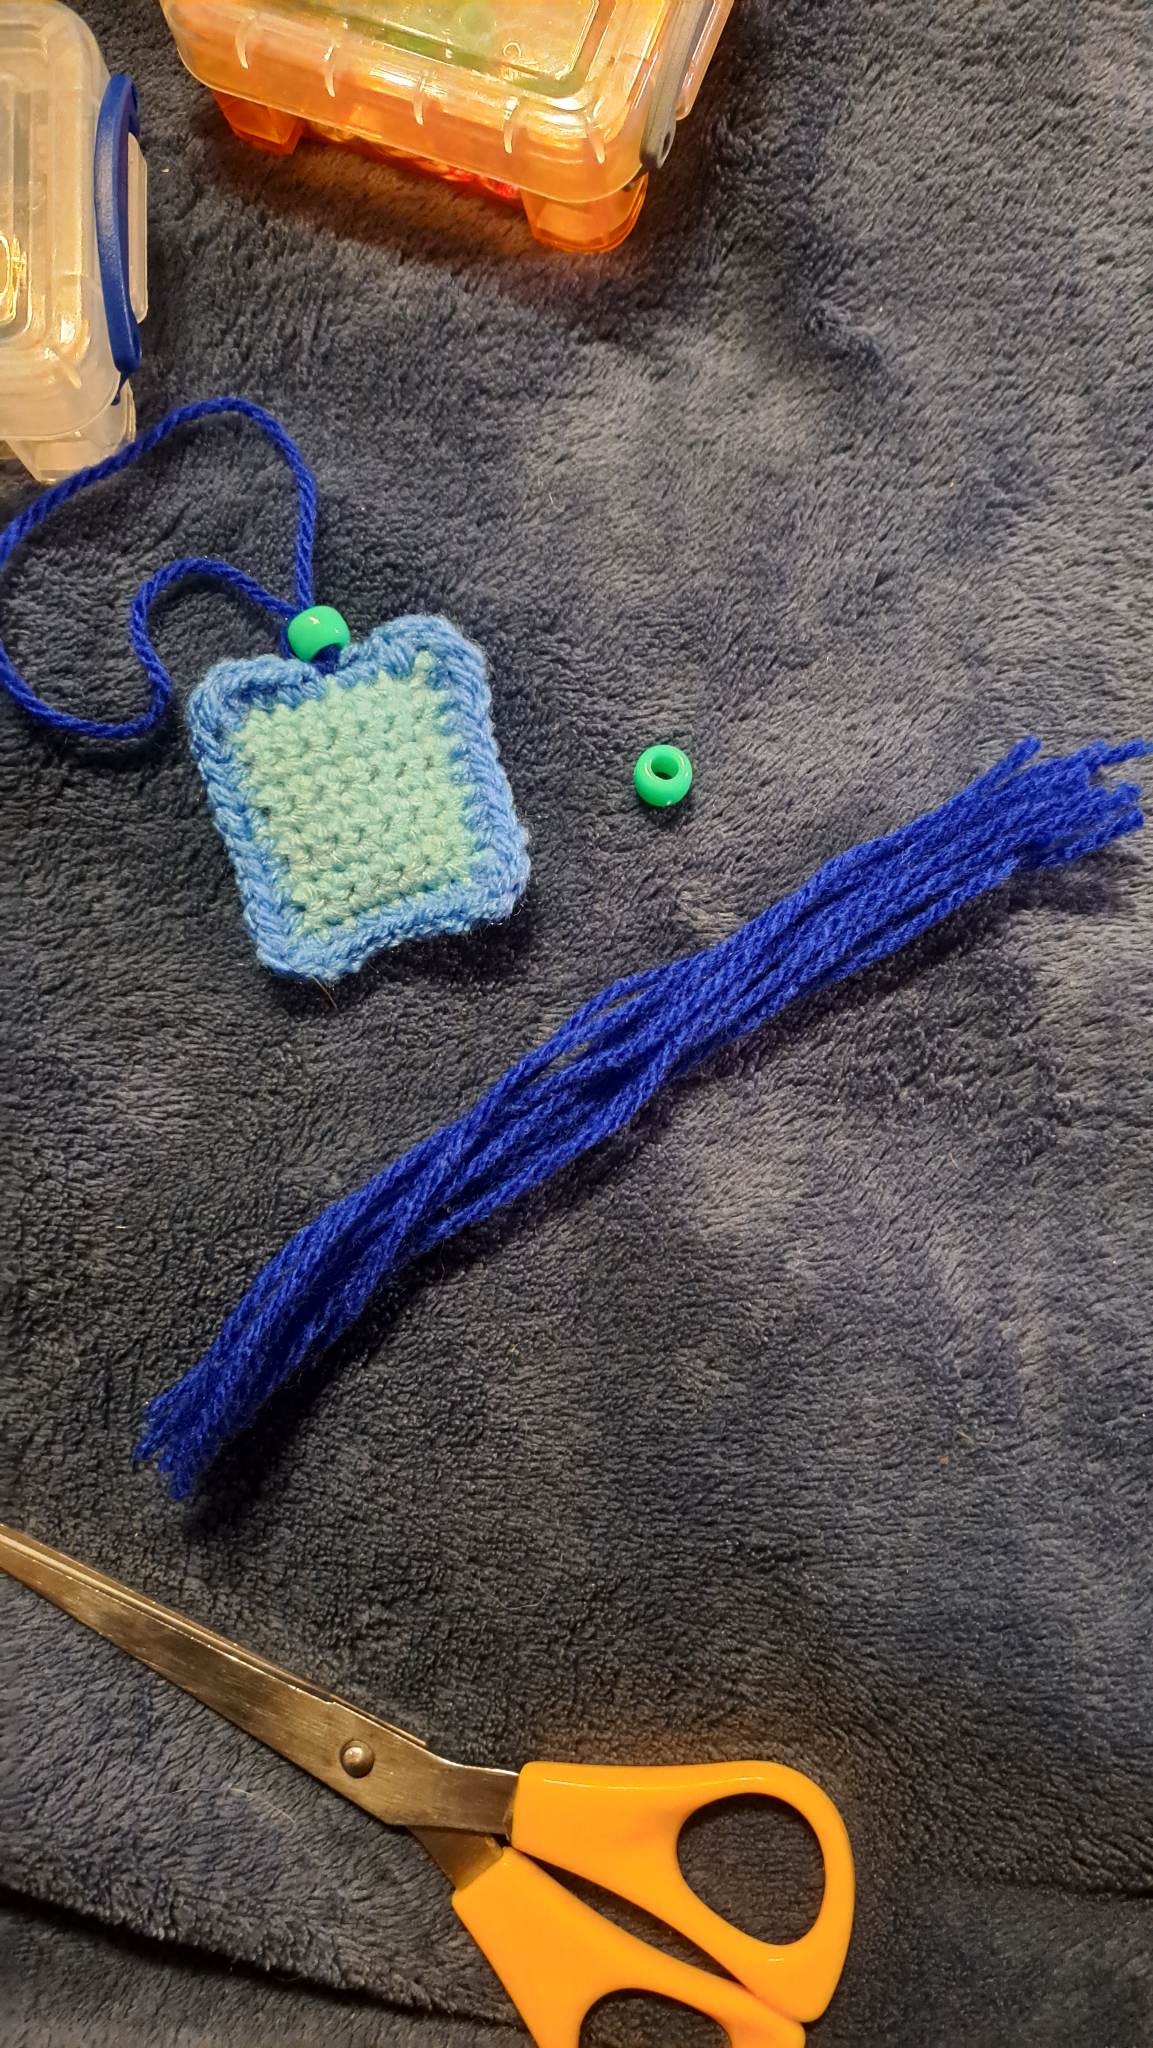
Take up the remaining pony bead and thread it onto the working strand and hold it on the tassel.
Next, thread the working strand through the front of the charm and bring everything up to the base of the charm.
Thread the needle through the bead and the front of the charm two more times to start and secure it.
Split
the tassel in half and work the strand through the middle of the tassel (where
the knot is) and back up through the bead. This scoops up all the strands and
makes sure they’re nice and secure and won’t pull out easily.
I
found working through the bead a total of 4 times was secure enough but if
you’d like to work a few more times through it you can.
Tie
the end off and hide it in the charm.
You
can snip off a bit of the tassel to neaten up any ends.
Then
that’s it!
You’re
done!
Enjoy
your new Shiny Charm and I hope it brings you luck!
STEP BY STEP TUTORIAL
If you have any questions about this pattern, feel free to contact me.
This pattern is property of BlueFoxPaws. Please do not claim or resell this pattern as your own. You can sell the finished product as long as credit is given -BlueFoxPaws-.
Leave a Reply